VMware Cloud Director Service for VMware Cloud on AWS Deployment Guide #
VMware Cloud Director™ service enables cloud providers to use VMware Cloud on AWS in multi-tenant modality with enhanced VMware NSX-T support, allowing provisioning of custom-sized, tenant-based, isolated, and secure VMware Cloud resources. This ability to service multiple smaller and medium sized tenants on the same infrastructure, offers flexibility to right-size the VMware Cloud on AWS environments to meet customer needs and requirements of all customer tiers.
VMware Cloud Director service is a container-based SaaS version of the proven VMware Cloud Director on-premises service-delivery platform. The service, available through VMware Cloud Partner Navigator, helps cloud providers gain better economies of scale and generate new value and revenue for their cloud businesses.
This guide details the process of deploying a VMware Cloud Director service Instance, associating it with a VMware Cloud on AWS SDDC designed for use with VMware Cloud Director service, configuring the Provider Virtual Datacenter to use the resources of the associated VMware Cloud on AWS SDDC, configuring the VMware Cloud on AWS SDDC networking to prepare it for multi-tenant use and deploying the first tenant organization.
Before using this guide, it is necessary to join the VMware Managed Service Provider Program and have the require contracts in place to use the VMware Cloud services mentioned in this guide. See the MSP VMware Cloud on AWS Operations Handbook and the Cloud Director service Operations Handbook for more details.
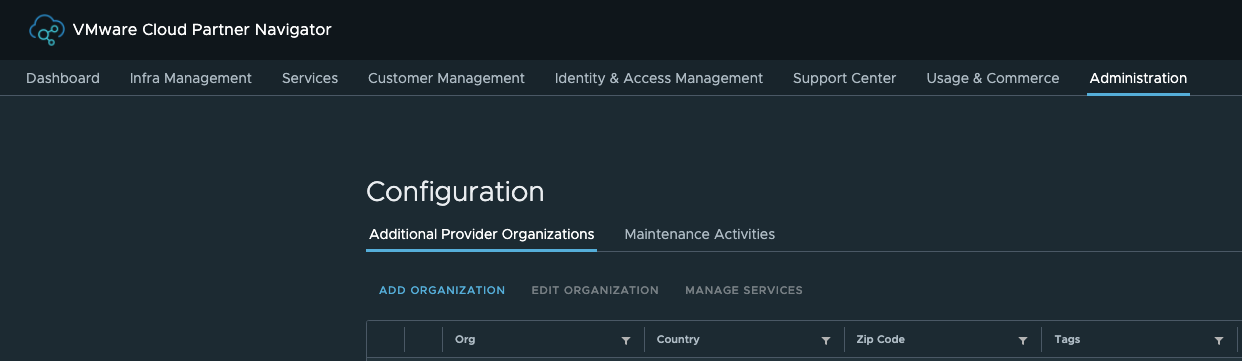
Prepare a VMware Cloud Partner Navigator Provider Organization #
Provision a new VMware Cloud Partner Navigator Organization
-
Click on Administration, then Add Organization
-
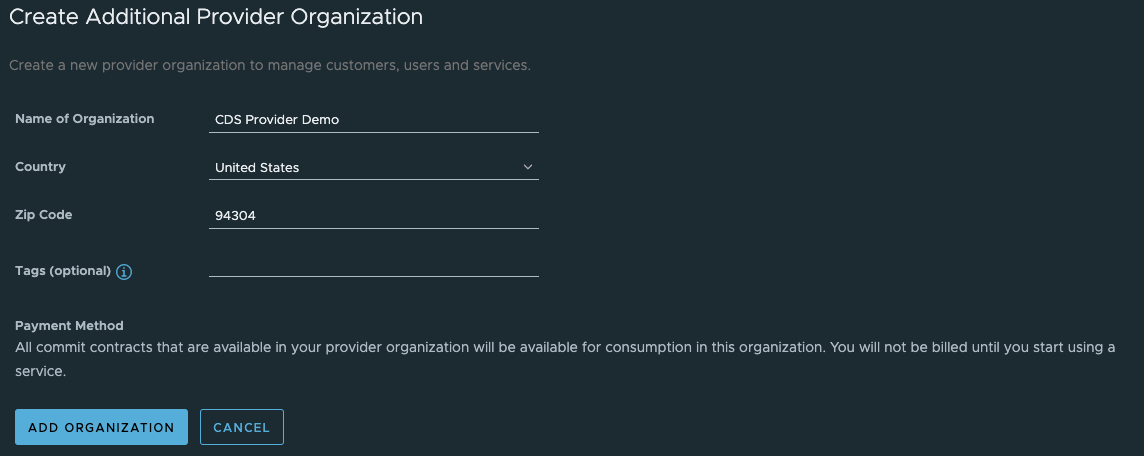
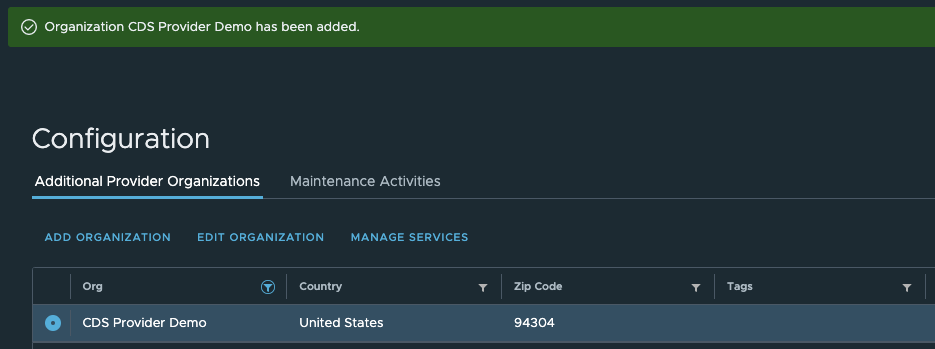
Fill out the Add Organization form and click Add Organization
Request access to VMware Cloud Director service by emailing: ask_cloud_director_service@VMware.com
-
Supply the Long ID of the Organization that will be used.

-
A onetime use invitation will be returned to activate VMware Cloud Director service.
Enable the VMware Cloud on AWS and VMware Cloud Director service services in the new Organization
-
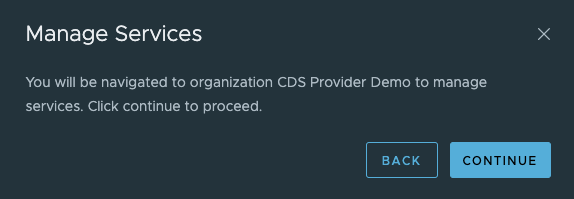
Select the new Provider Organization and click Manage Services
-
Click Continue
-
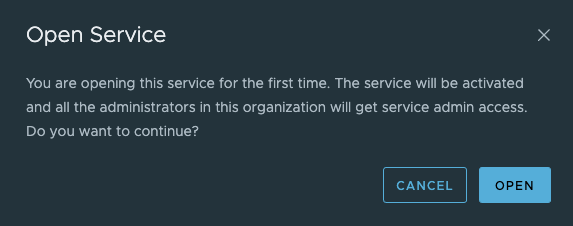
Click Open on both service tiles to activate the services
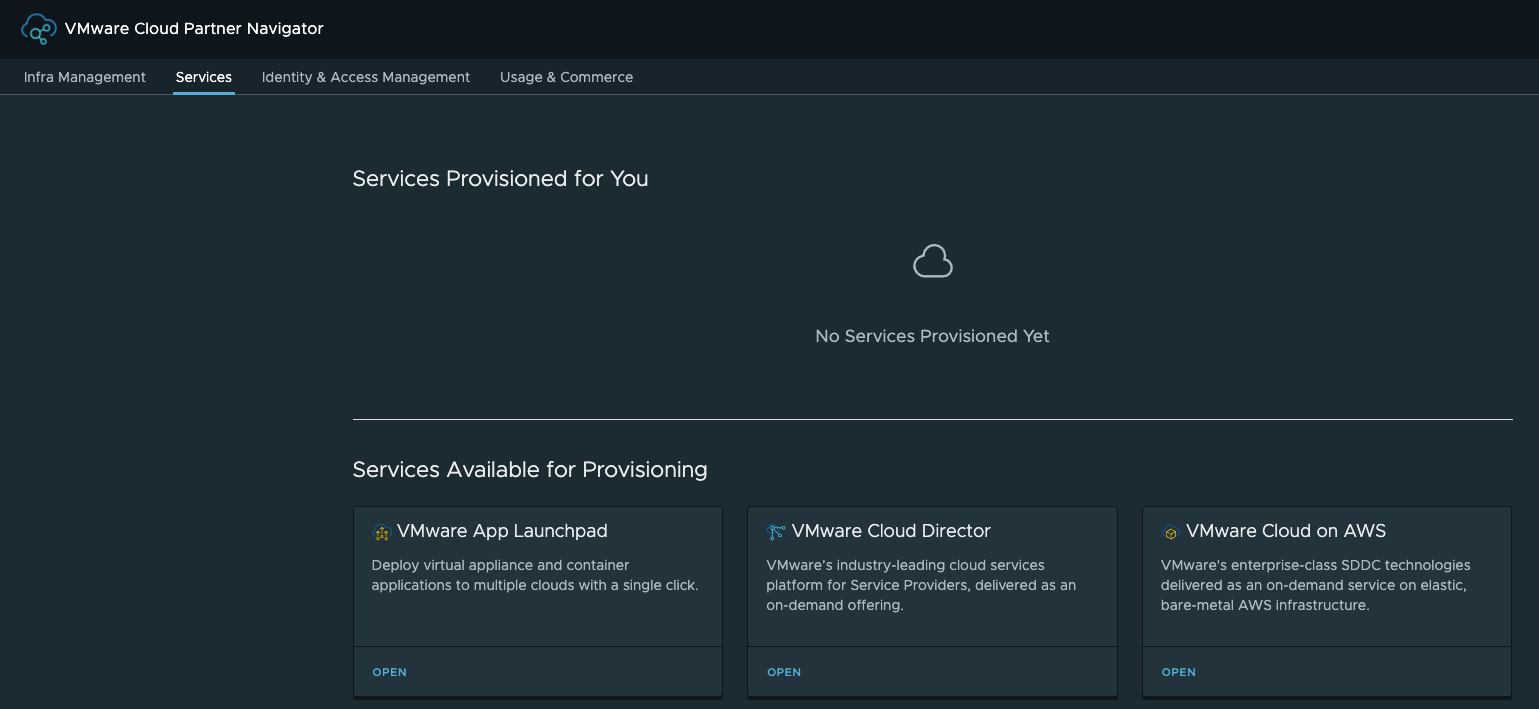
-
Click Open to continue
NOTE: It is also acceptable to use an existing Provider Organization enabled for VMware Cloud on AWS [which has no SDDCs currently deployed.]{.underline}
Deploy a SDDC #
Deploy the SDDC in the same VMware Cloud Partner Navigator Organization activated above.
-
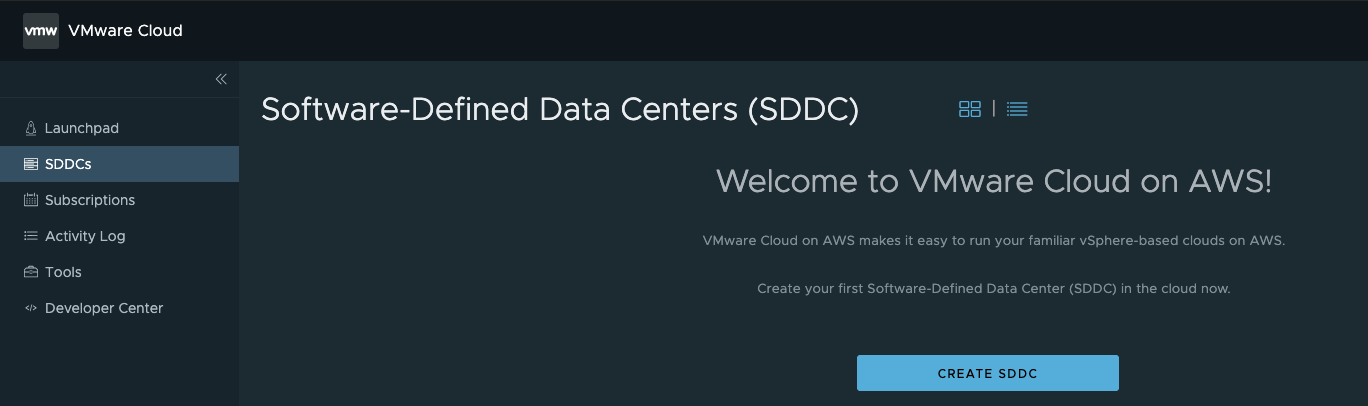
Select the VMware Cloud on AWS service tile

-
Select SDDCs and click Create SDDC
-
Fill out the form to deploy the SDDC according to your requirements. For more details about the deployment process for VMware Cloud on AWS SDDCs see Deploy an SDDC from the VMC Console.
NOTE: All VMware Cloud on AWS SDDCs used with VMware Cloud Director service must be deployed in Organizations that have been enabled for VMware Cloud Director service. SDDCs deployed in other Organizations are not compatible with VMware Cloud Director service.
Deploy VMware Cloud Director service Instance #
-
Select the VMware Cloud Director service tile
-
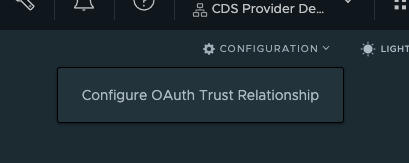
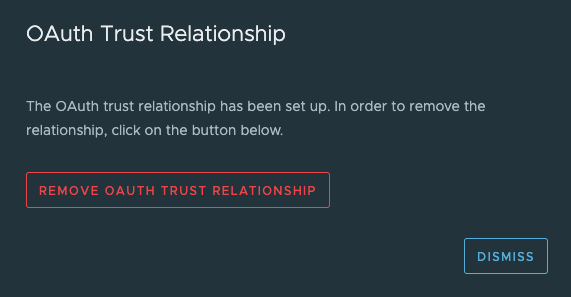
If someone other than the Organization Owner will be deploying VMware Cloud Director service Instances the Organization Owner must first establish a trust relationship between VMware Cloud services and VMware Cloud Director service.
a. In the Cloud Director Instances screen select Configuration then Configure OAuth Trust Relationship
b. Select Dismiss once the trust is established
 -
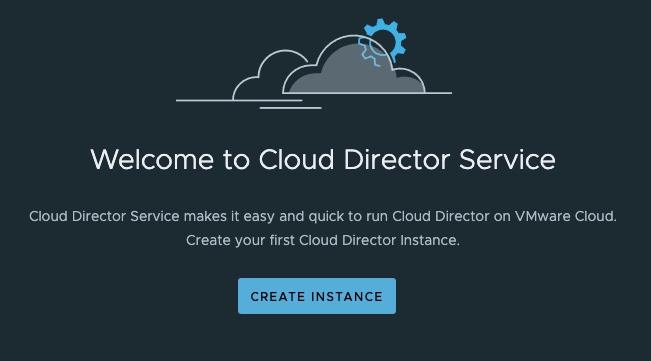
Select Create Instance to begin the instance deployment process.
-
Enter the data needed in the form and click on NEXT
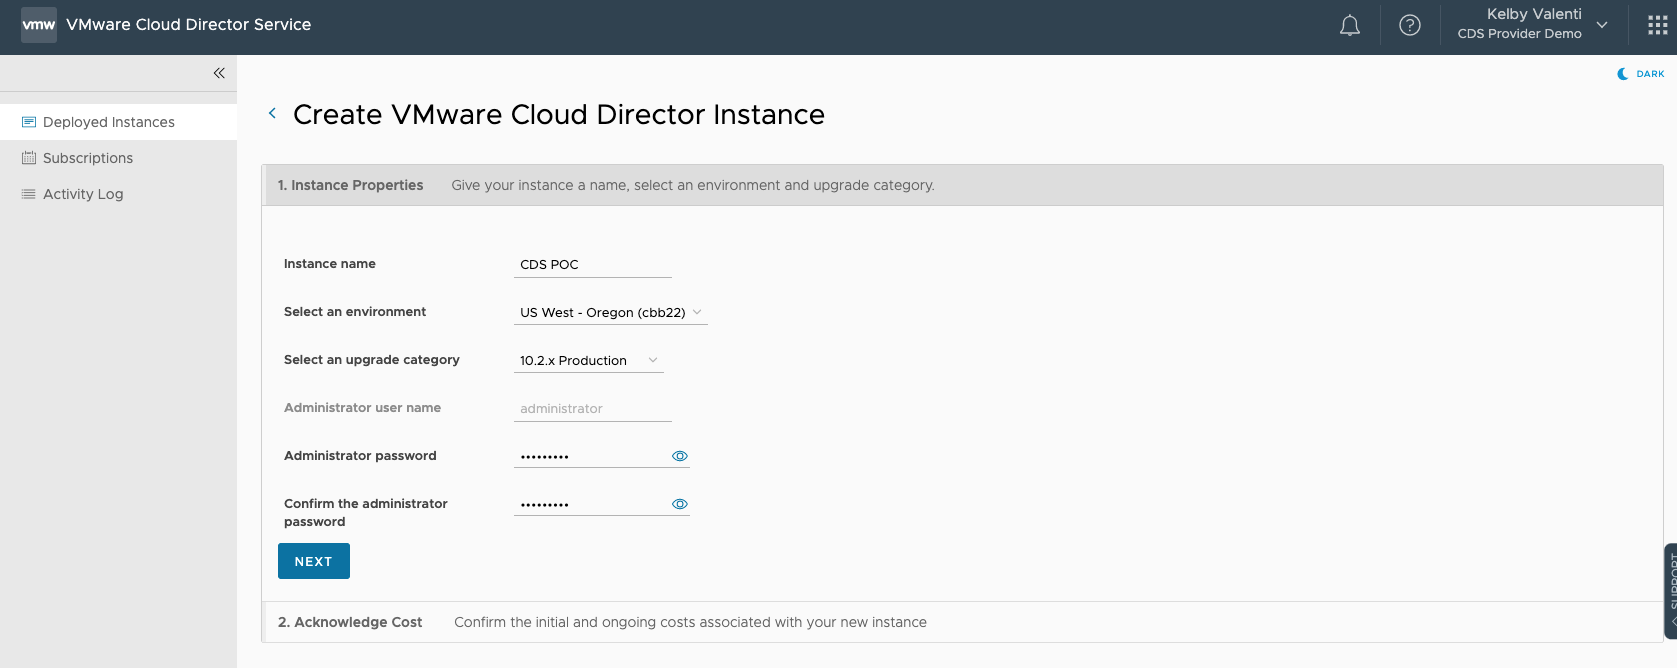
Note: For the Upgrade Category, selecting Preview (if enabled) identifies this Cloud Director service Instance to be patched or upgraded earlier than when Production is selected. Use Preview for service development environments. The Upgrade Category cannot be changed after deployment.
-
Acknowledge costs and then click on CREATE INSTANCE
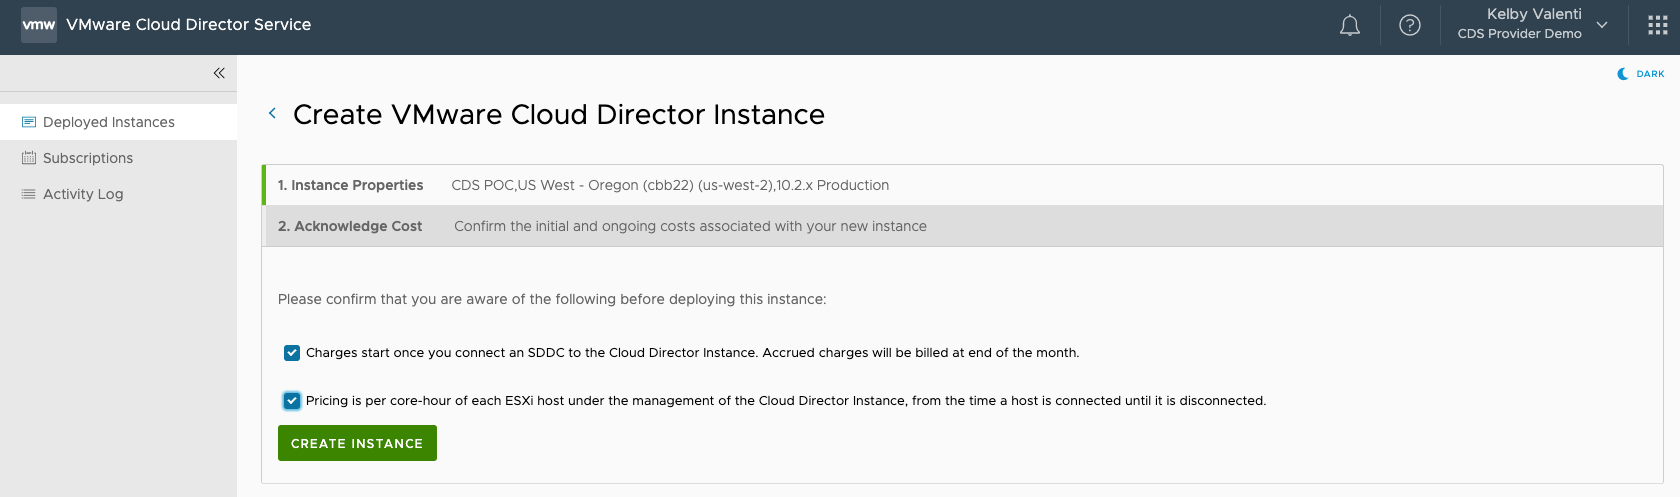
-
Click on Activity Log for detailed information about the deployment progress.
When the VMware Cloud Director instance deployment is complete, its card displays a Ready status.
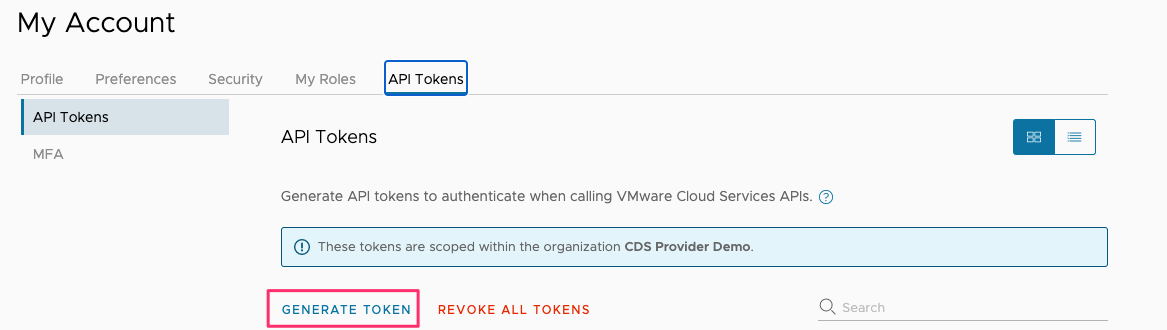
Generate API Token #
An API token for the Organization holding the SDDC is used to associate the SDDC with VMware Cloud Director service.
-
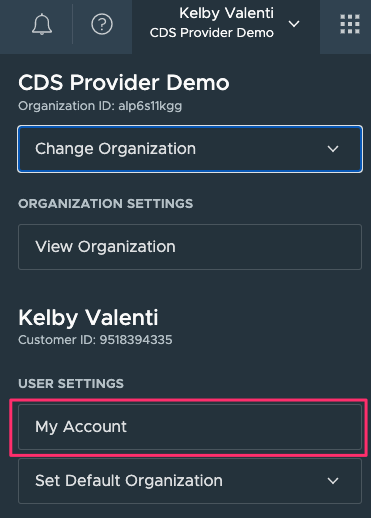
Click on your name in the top right and then click on My Account
-
Click on API Tokens

-
Click on GENERATE TOKEN
-
Enter form fields and then click on GENERATE
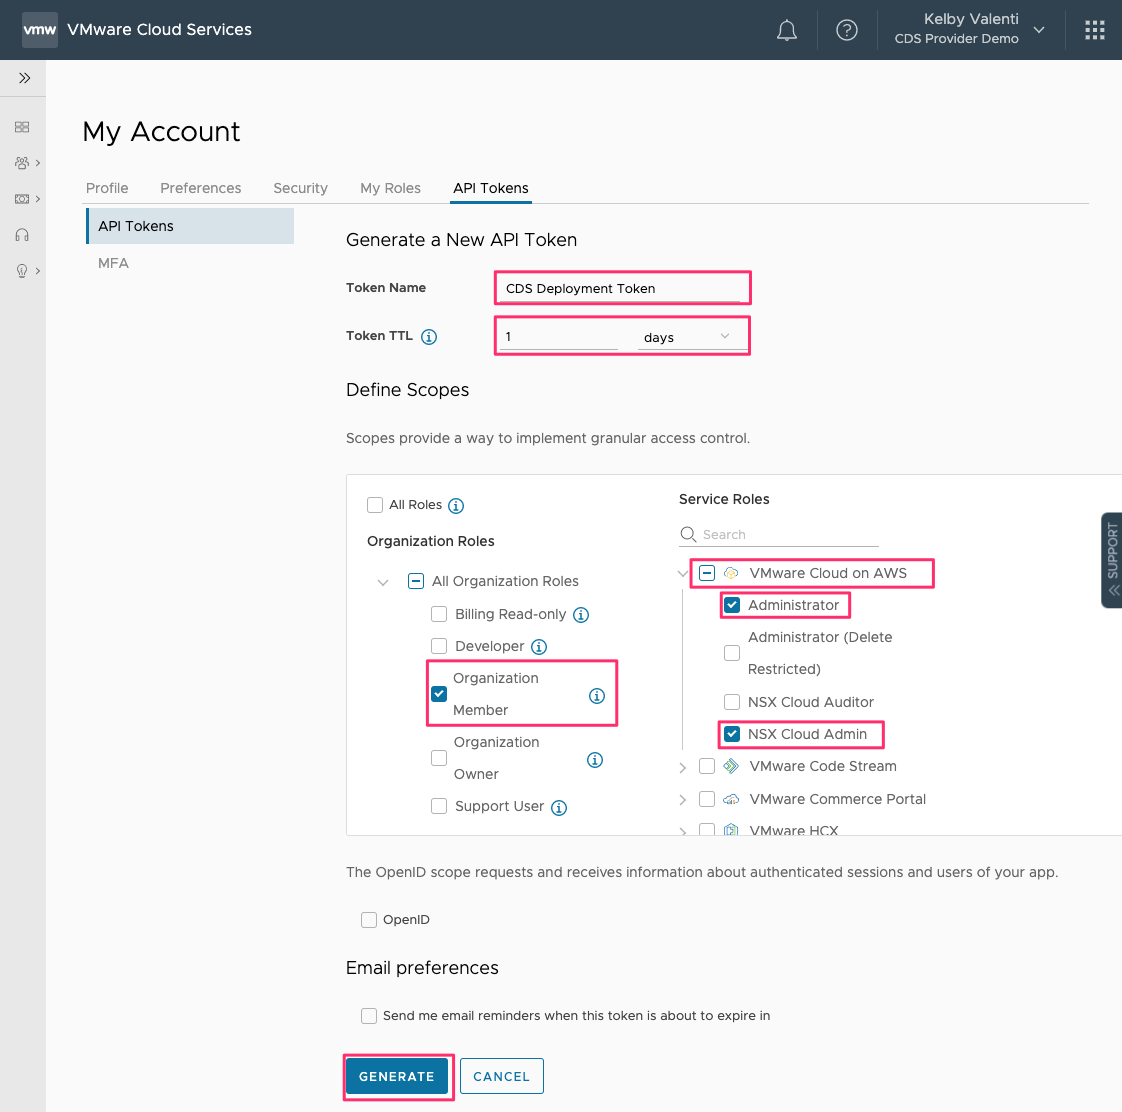
Notes: This token is only used during the association process, so its Token TTL should be short. Minimum required Organization Role is Organization Member. Minimum required Service Roles are VMware Cloud on AWS - Administrator and VMware Cloud on AWS - NSX Cloud Admin. Make sure to store the generated token in a safe place.
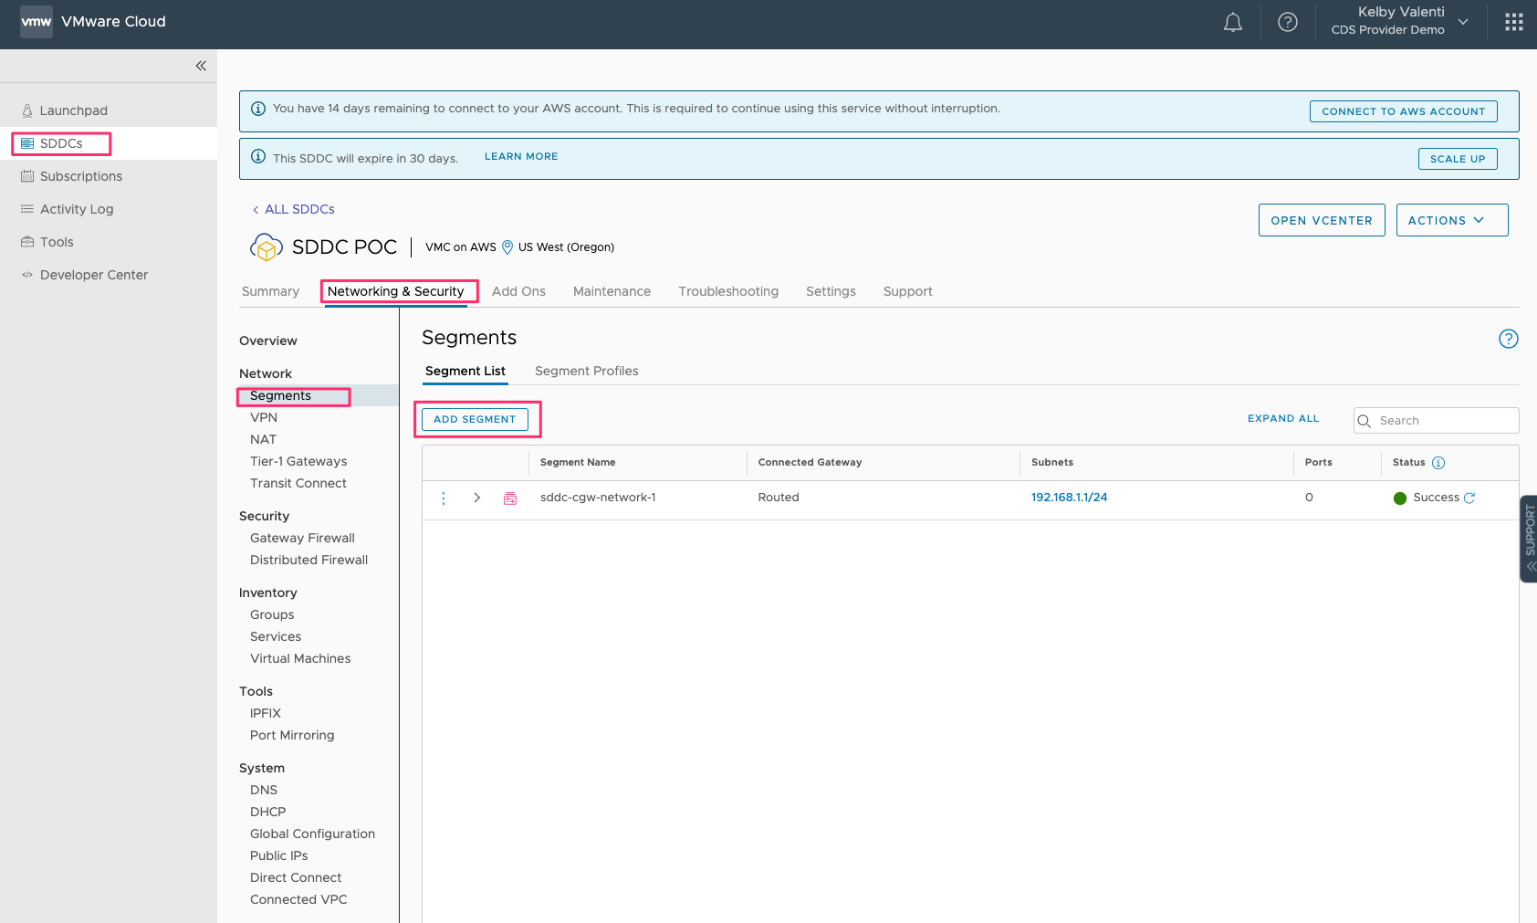
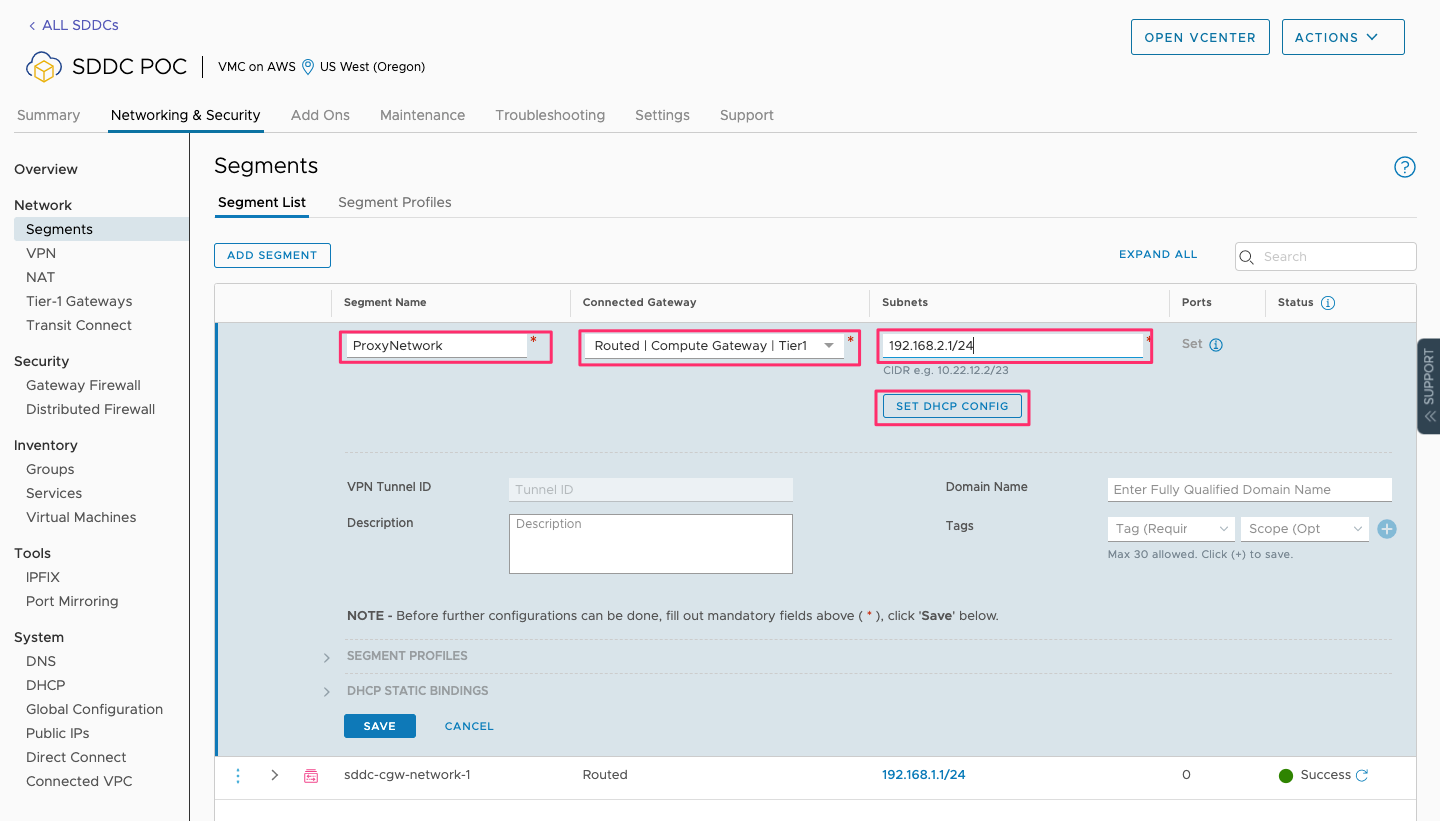
Create a DHCP Network #
Need to create a network segment that has routed access to the SDDC management network, provides DHCP service and has a DNS server configured. Note: This step can be skipped if you only have one host in your SDDC.
-
Click on ADD SEGMENT
-
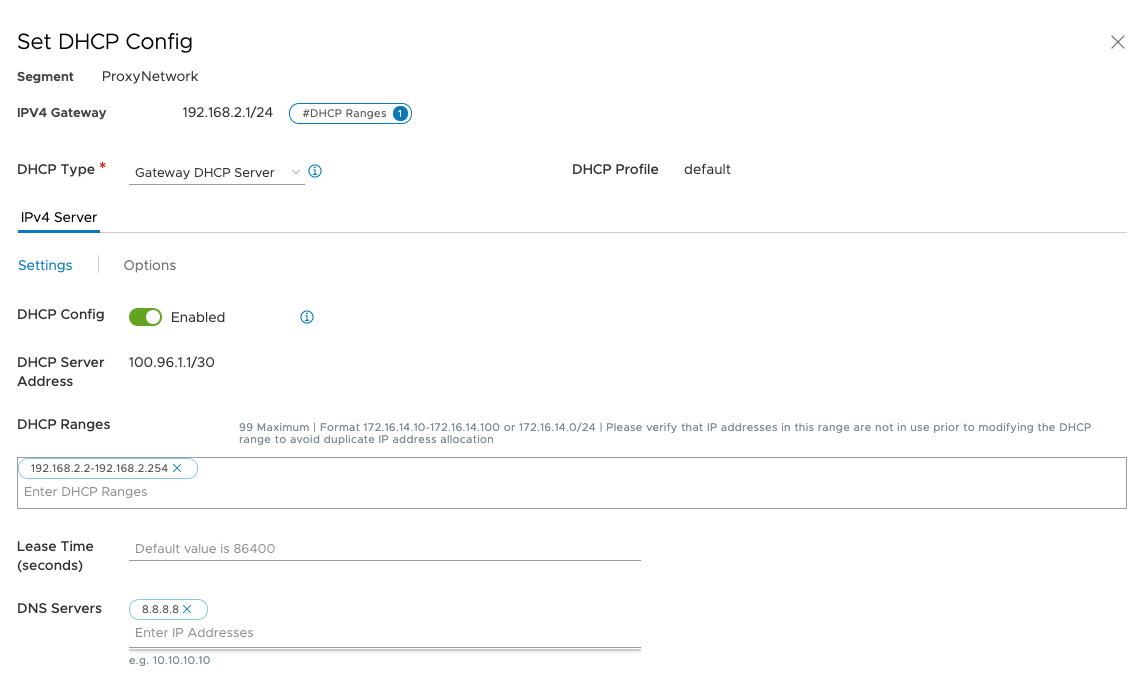
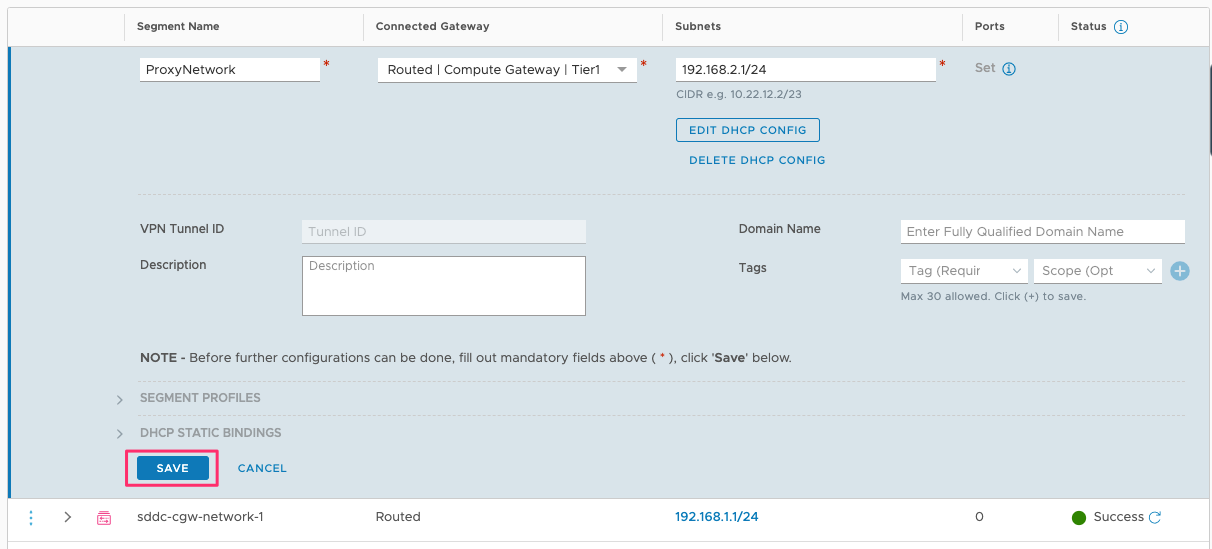
Enter segment details and then click on SET DHCP CONFIG
-
Enter details and then click on APPLY
-
Click SAVE
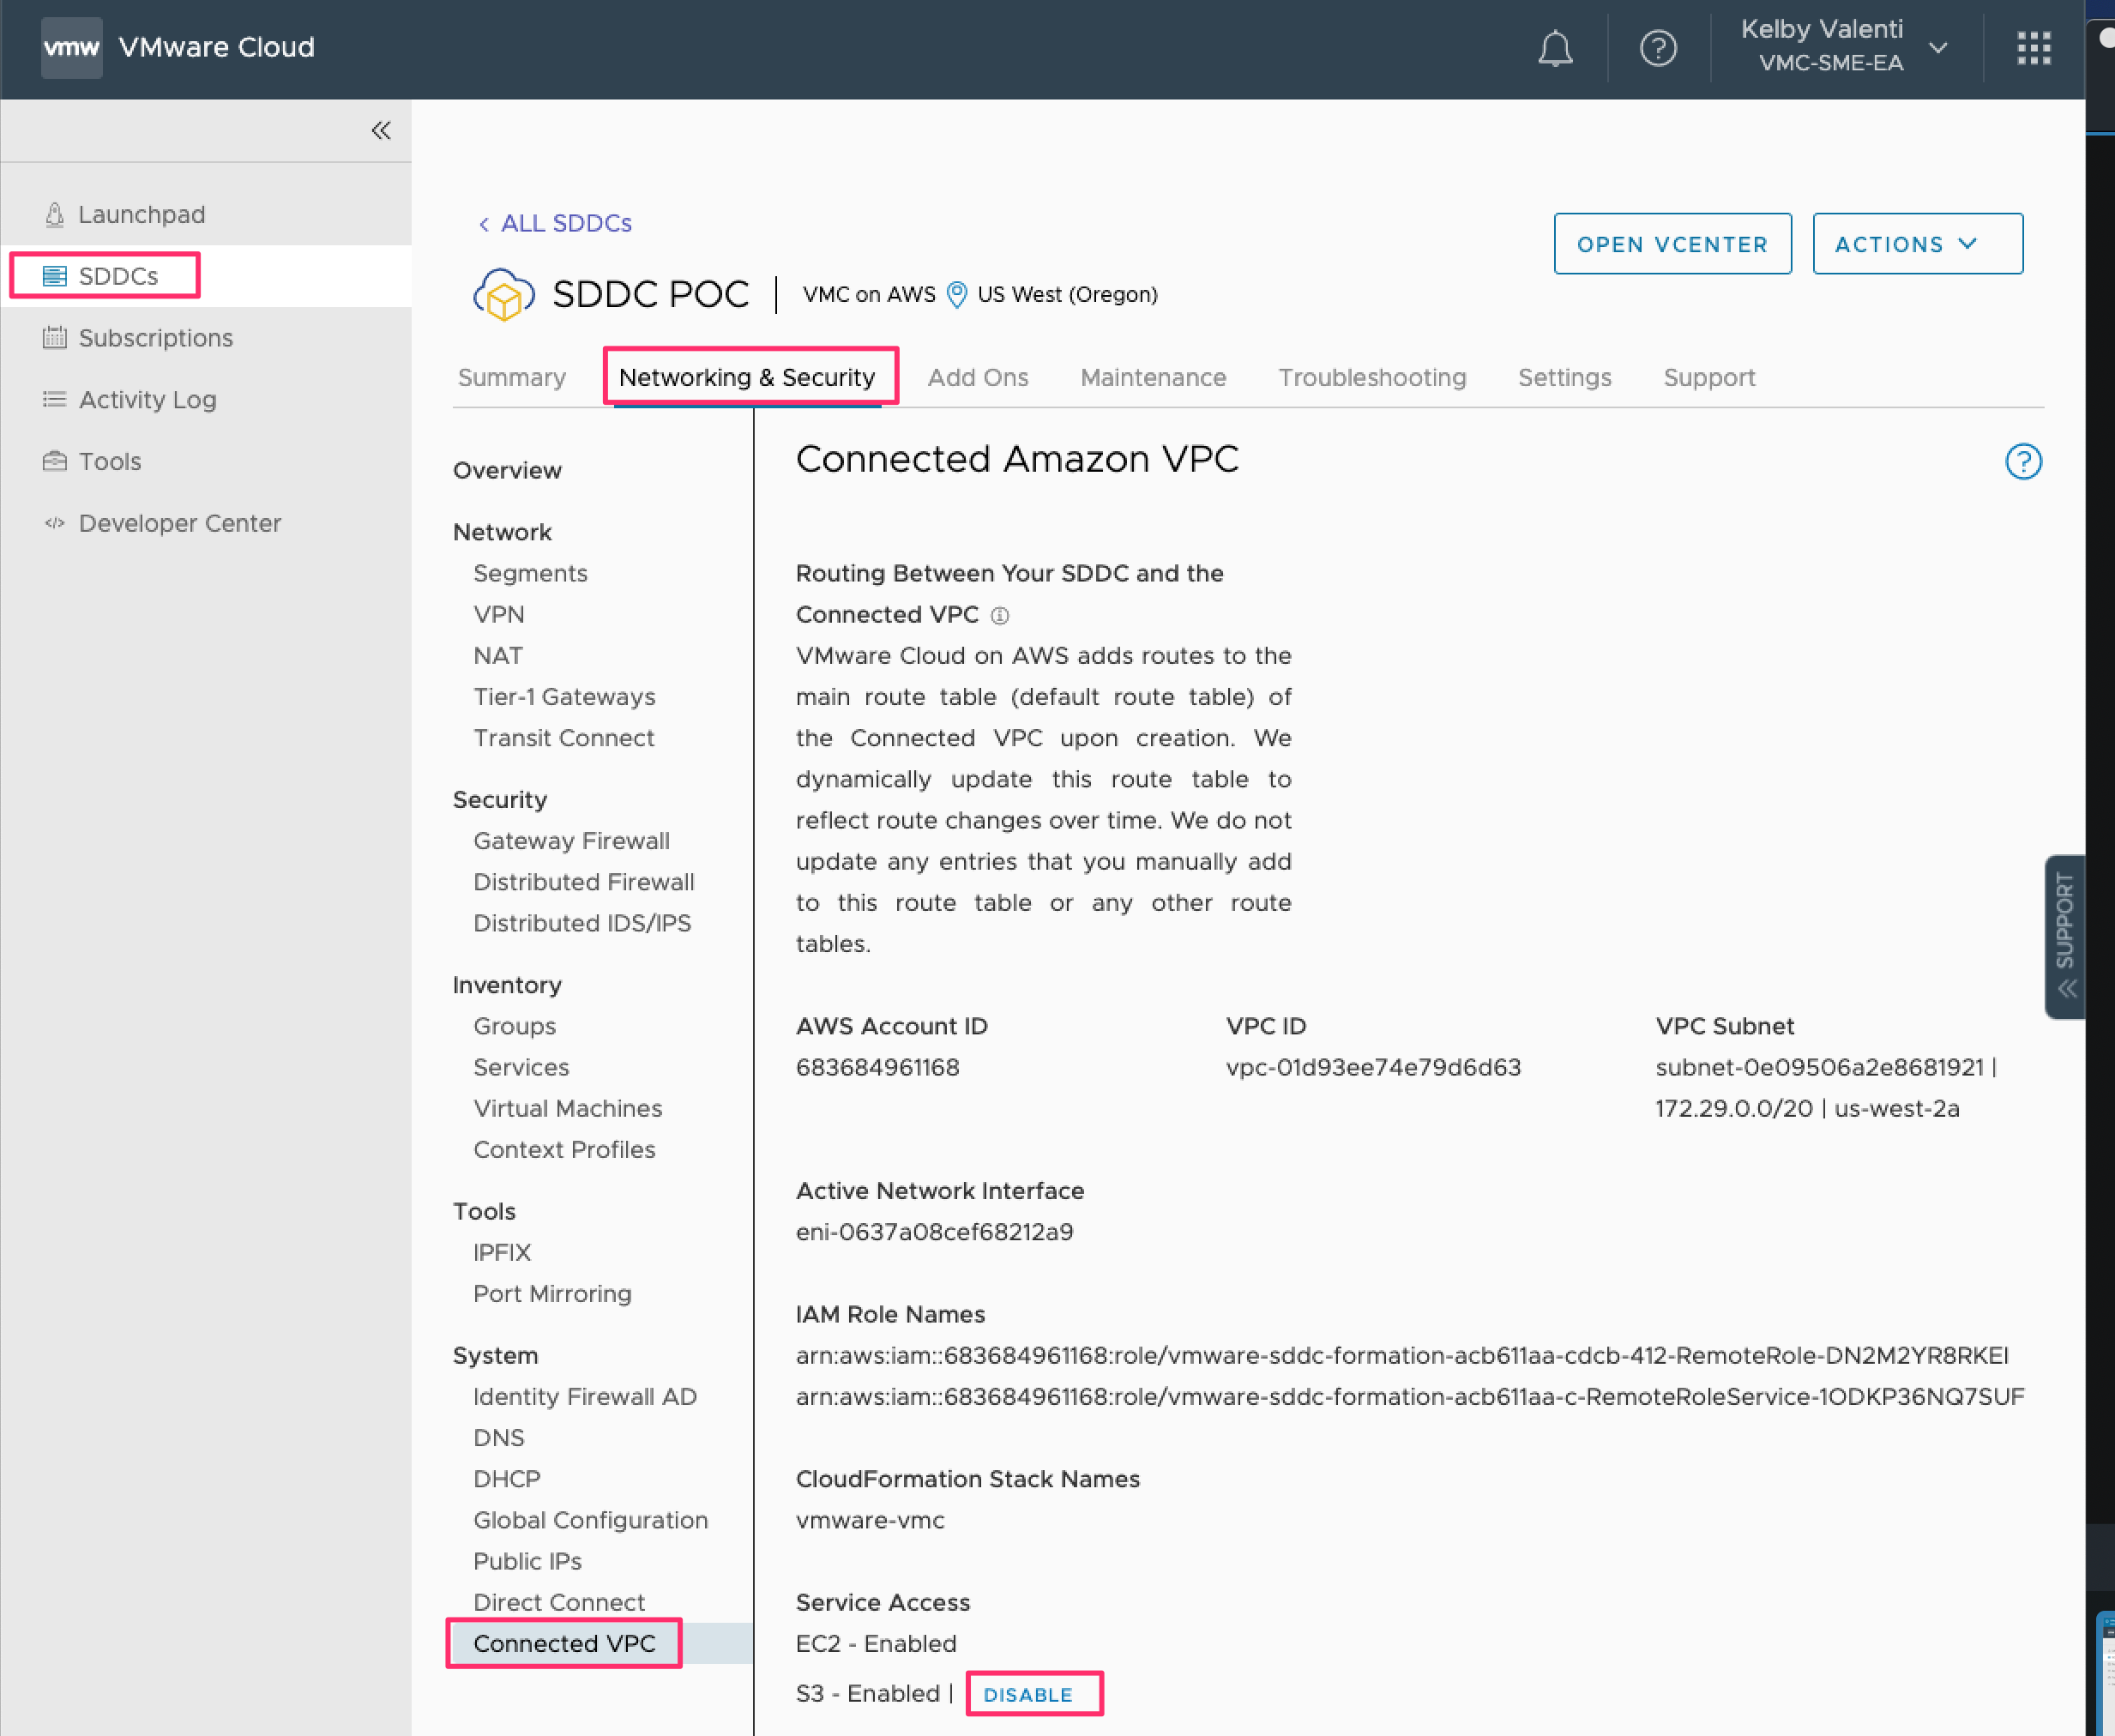
S3 Configuration #
If your SDDC is in Oregon (us-west-2), you will need to either disable S3 or configure a S3 VPC endpoint prior to associating the SDDC. If your SDDC is in any other region, this step can be skipped. By default, S3 traffic in the local region fails until either a VPC endpoint is configured or S3 is disabled. Part of the associate process automatically deploys a proxy appliance into the SDDC. That proxy appliance currently is stored on an S3 bucket in Oregon (us-west-2), which given the default configuration makes it inaccessible.
Disable S3 #
- Click DISABLE
Configure S3 VPC endpoint #
See the Amazon Virtual Private Cloud AWS PrivateLink documentation: Endpoints for Amazon S3
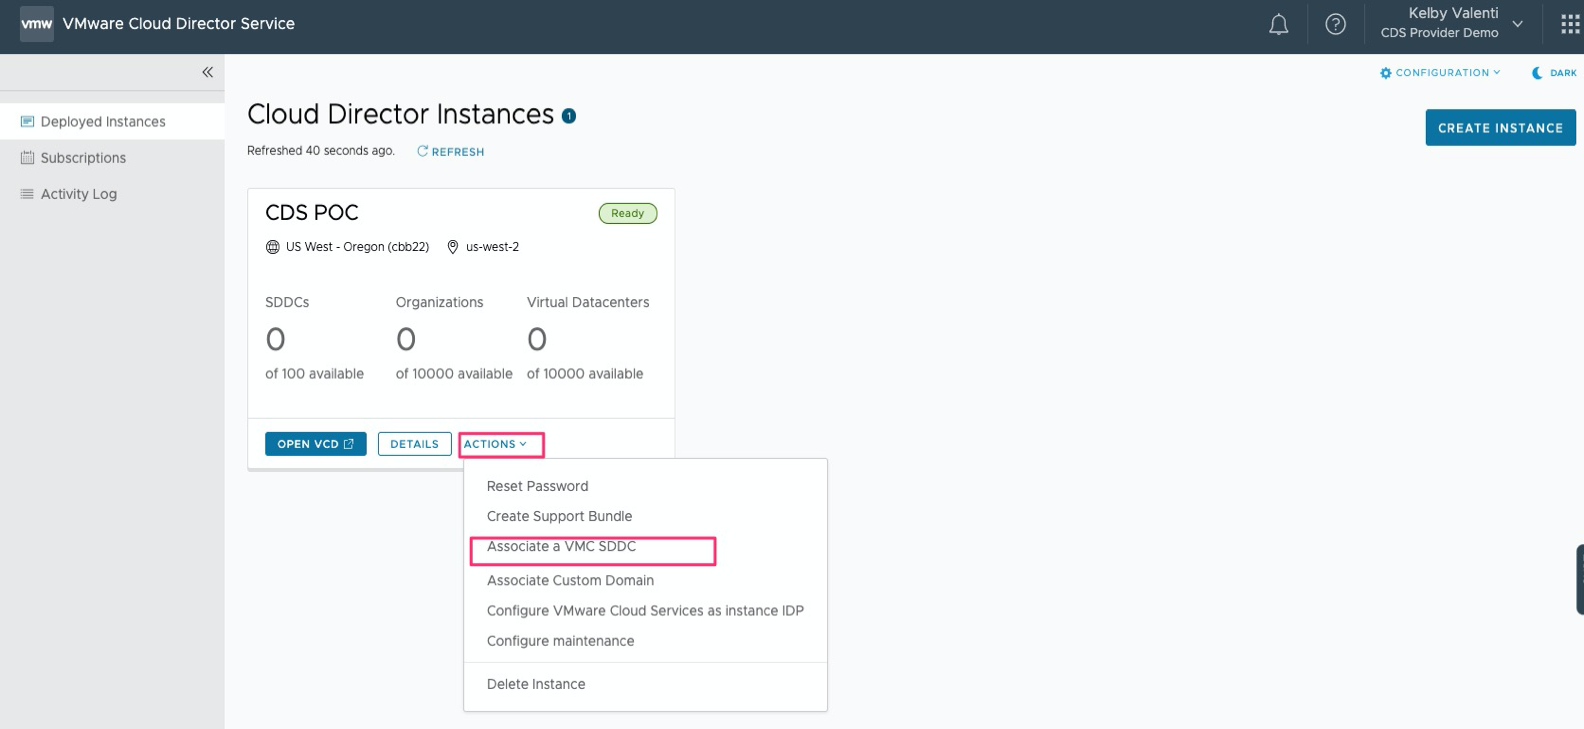
Associate VMware Cloud Director service Instance #
-
Click Associate a VMC SDDC
-
Enter fields and then click on ASSOCIATE a VMC SDDC
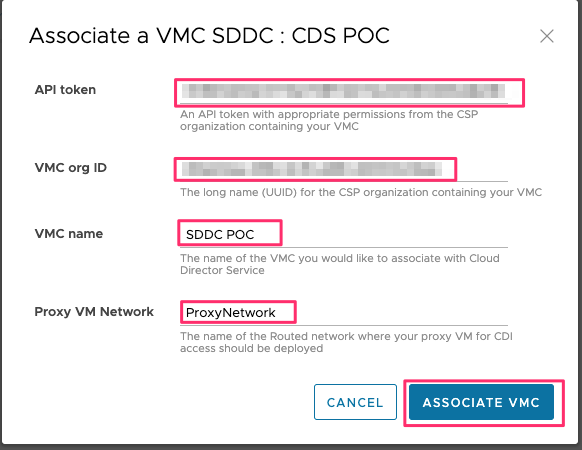
Note: If you only have one host in your SDDC, you can use the predefined network named “sddc-cgw-network-1” for the Proxy VM Network field.
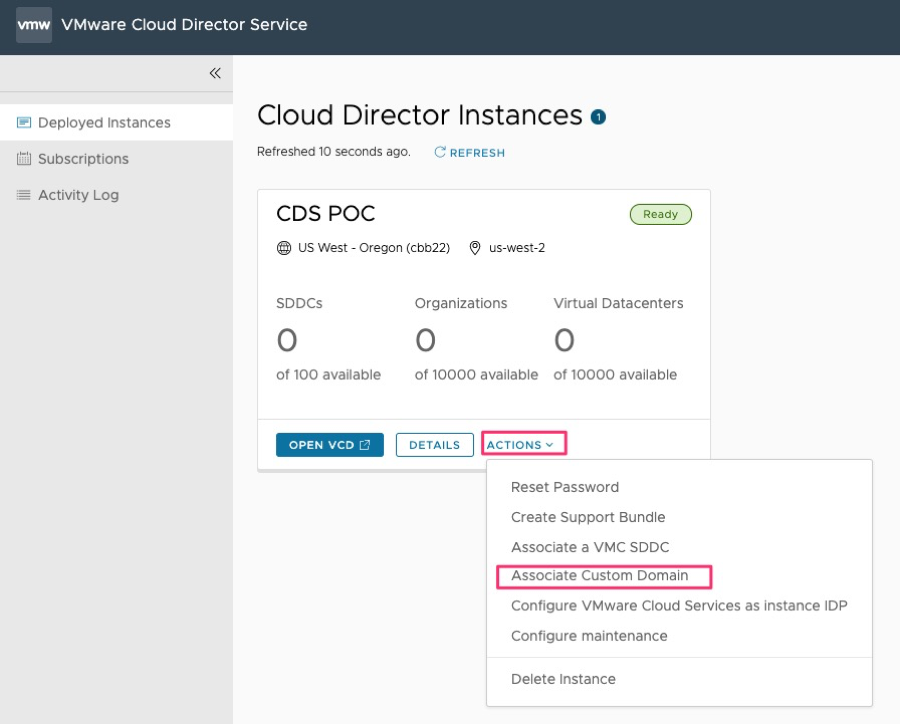
Associate Custom Domain (Optional) #
Allows the provider to use their own domain name for VMware Cloud Director service Instances.
-
 Click on ACTIONS and then click on
Associate Custom Domain
Click on ACTIONS and then click on
Associate Custom Domain
See the VMware Cloud Director service documentation Customize the DNS and Certificate Settings for more details.
VMware Cloud Director service Instance Configuration #
Launch the Provider Portal #
-
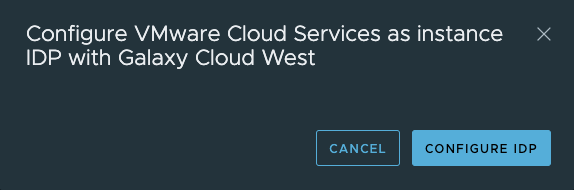
To use VMware Cloud Services as an Identity Provider for VMware Cloud Director service Instances, select Configure VMware Cloud Services as instance IDP from the Actions menu of each VMware Cloud Director service Instance.
-
Select Configure IDP
-
Click on
OPEN INSTANCE
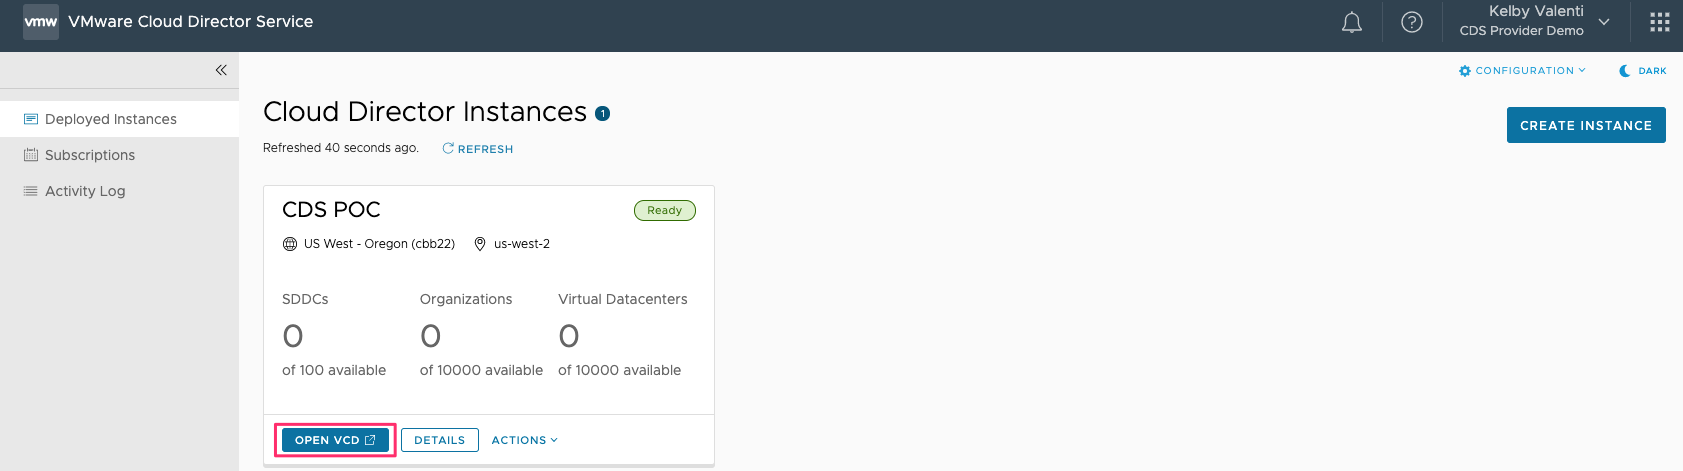
NOTE: To control user access when VMware Cloud Services is used as the VMware Cloud Director service Instance IDP, use the Role Assignment feature in VMware Cloud Partner Navigator to grant users Admin, Read Only or No Access roles to all IDP enabled VMware Cloud Director service Instances. The Admin role will login to instances with the CDS Provider Admin role. The Read Only role will login to instances with the CDS Provider Admin Read Only role.
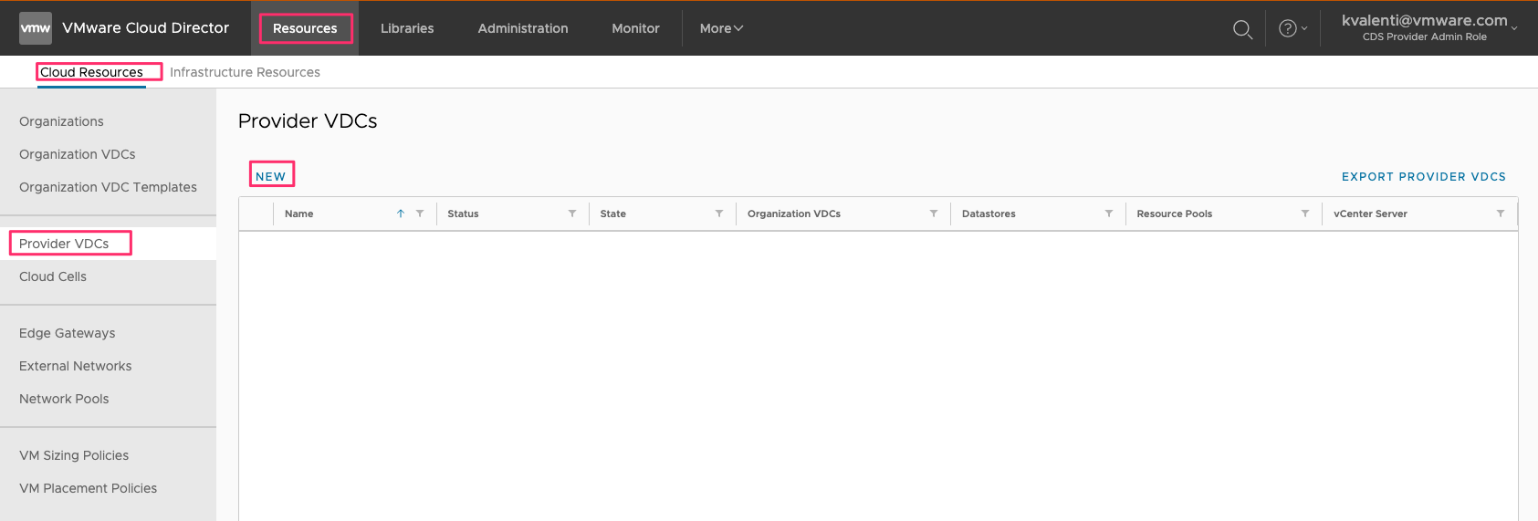
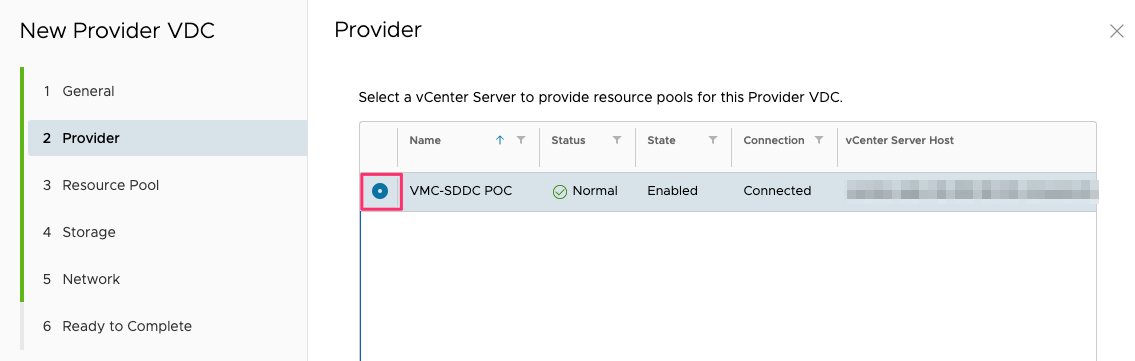
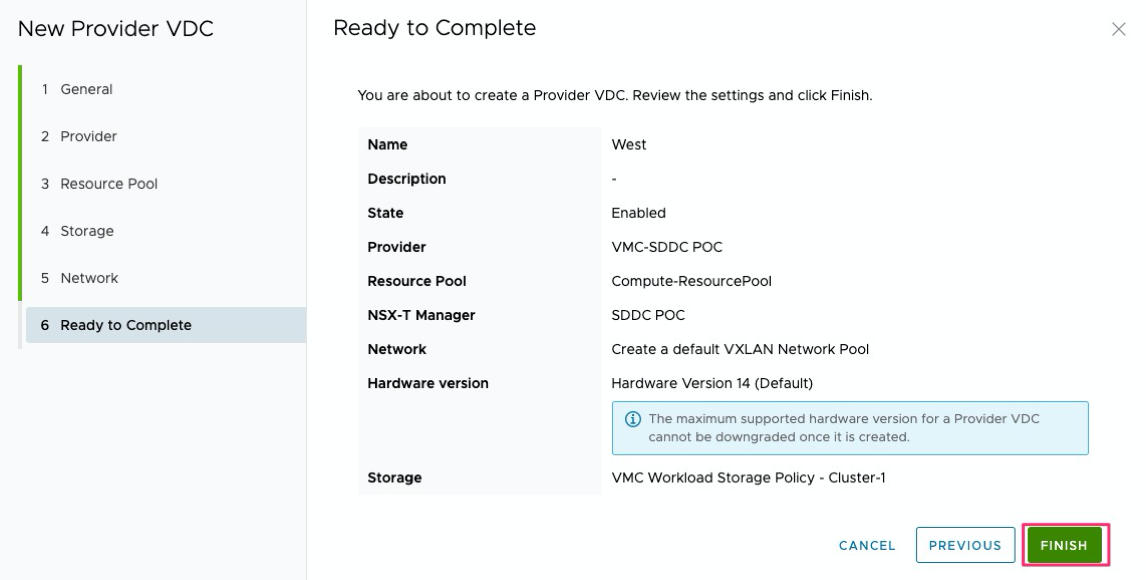
Create Provider VDC #
-
Click on NEW
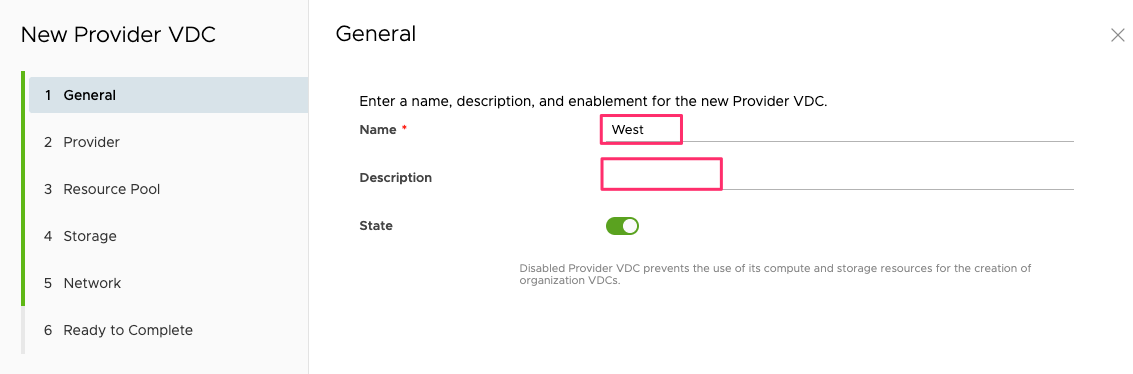
-
Enter details and then click on NEXT
-
Select vCenter and then click on NEXT
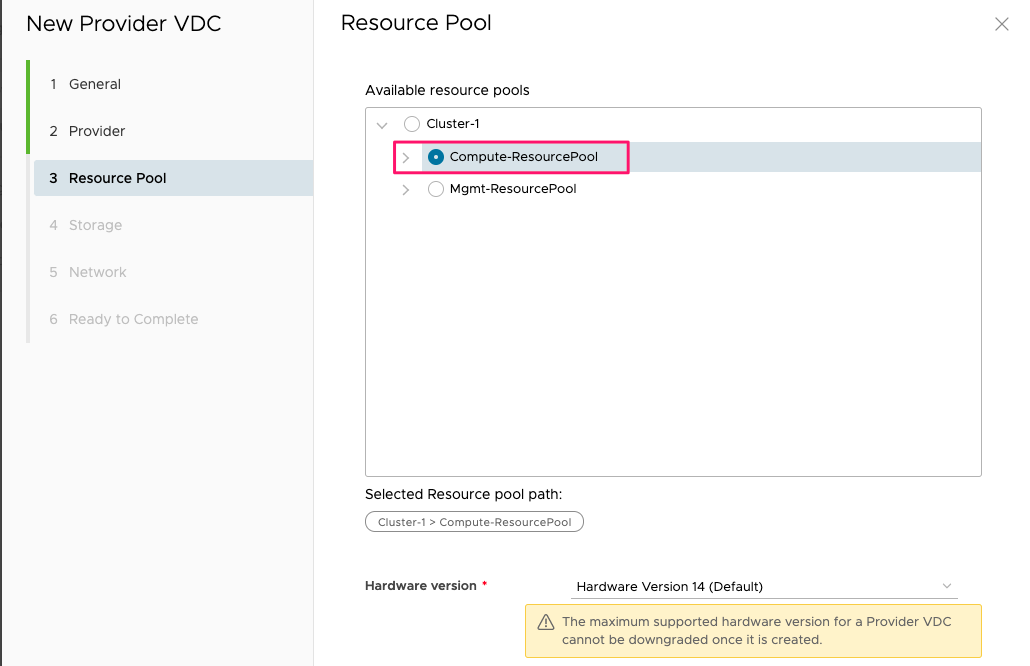
-
Select Resource Pool, Hardware version and then click on NEXT
-
Select the VMC Workload Storage Policy – Cluster-1 and then click on NEXT.
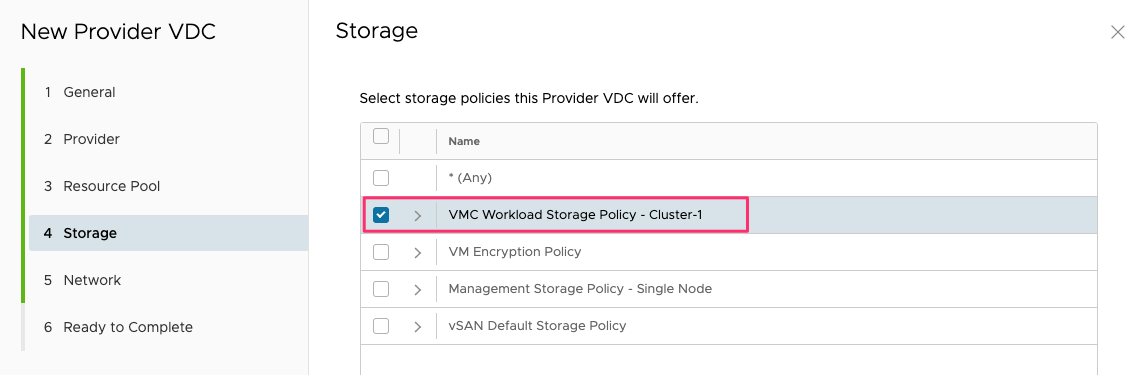
Note: Make sure that the other storage policies are left unselected.
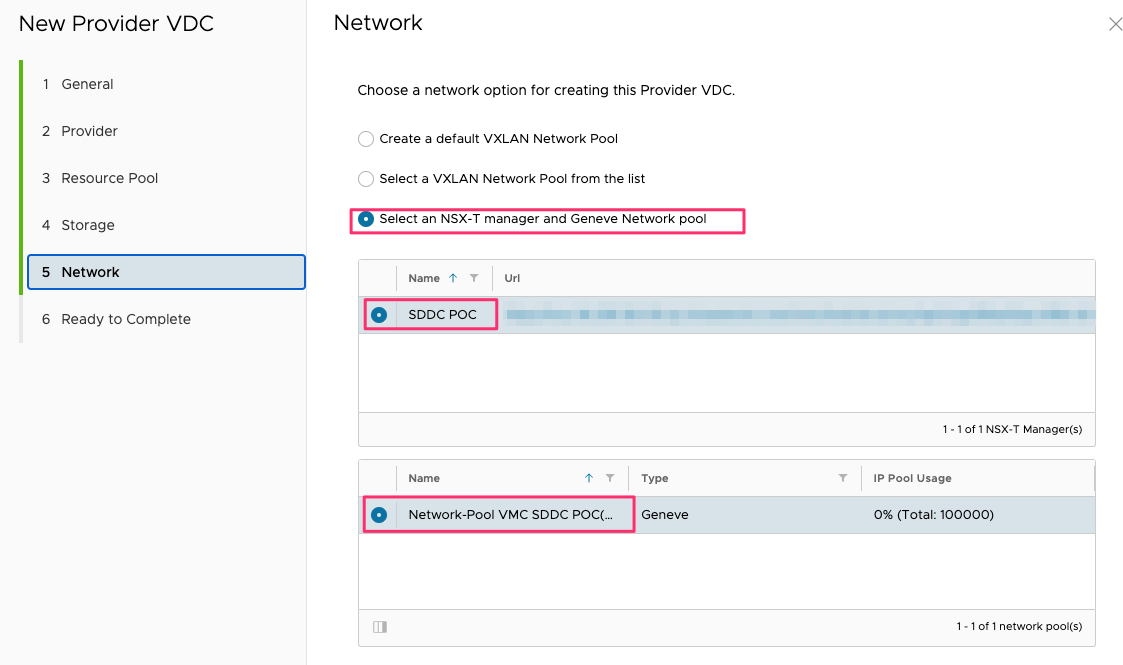
-
Select NSX-T manager and Geneve Network pool and then click on Next.
-
Click on FINISH
Update External Network with valid IP range #
-
Click on Tier-0 Gateways in the left pane and then click the name of the pre-existing External Network.
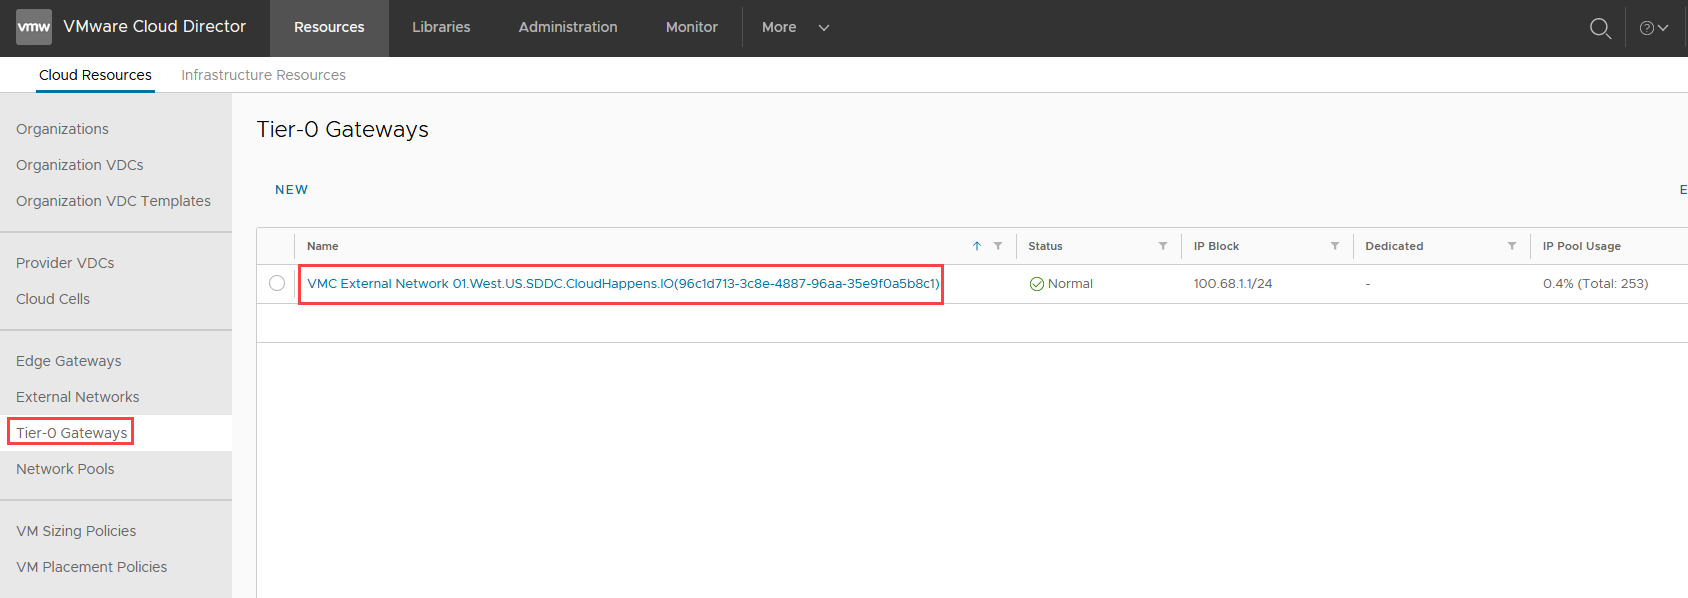
-
Click on Network specification and then Edit.

-
Delete existing network spec by selecting it and then clicking on DELETE
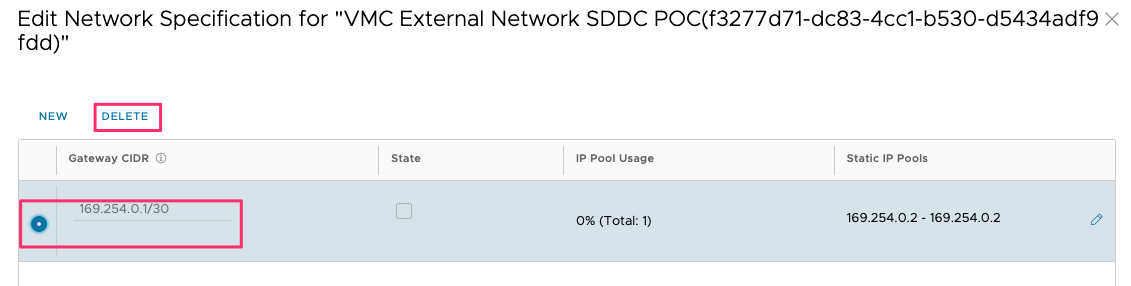
-
Click on NEW

-
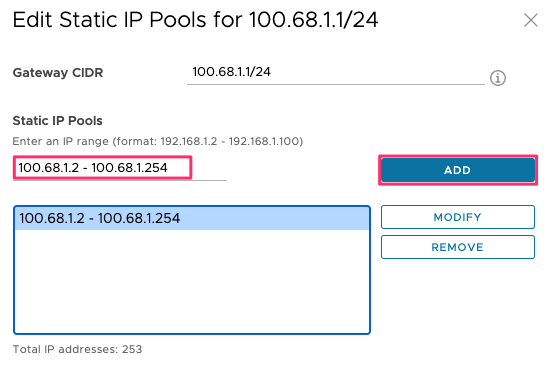
Enter Gateway CIDR and click on the pencil.
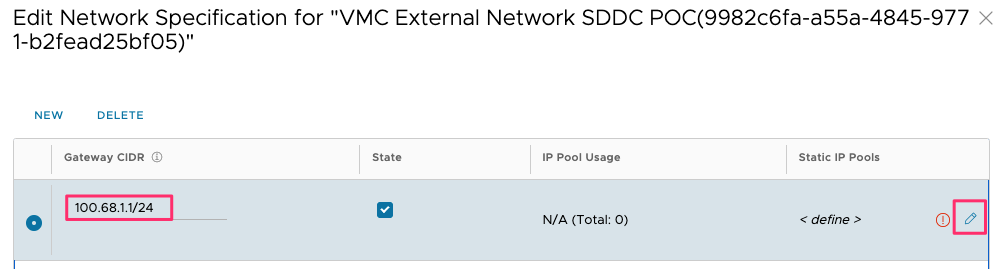
Note: We recommended that you use a subnet in the 100.64.0.0/10 range (RFC-6598 – Carrier-grade NAT) to avoid conflicts with RFC-1918 private address space used in on premises locations and allow for extensive NATing of tenant IPs to the External Network. For example, you may choose 100.68.1.1/24 for the first SDDC deployed and use 100.68.2.1/24 for the second SDDC and so on. It is important to note that NSX-T uses 100.64.0.0/16 for T0-T1 interlink and is not available for use in an NSX-T environment like VMware Cloud on AWS.
-
Enter Static IP Pools, click ADD and then click on SAVE
-
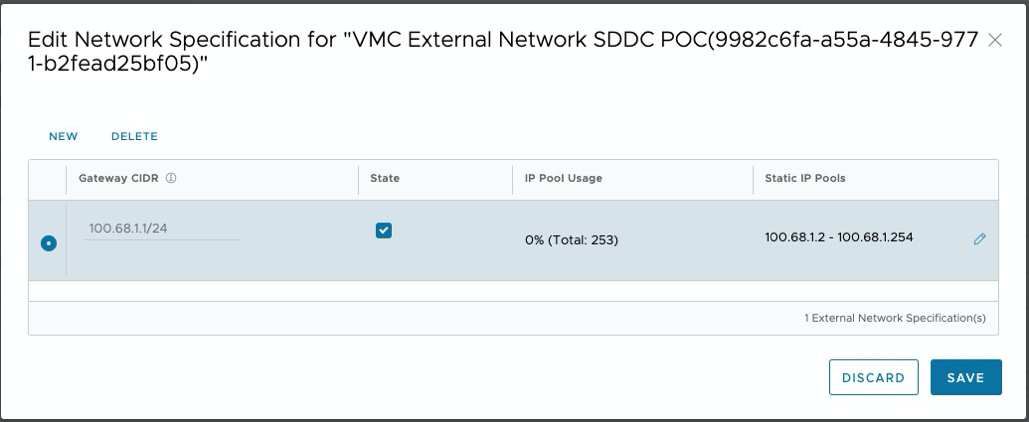
Click on **Save
**
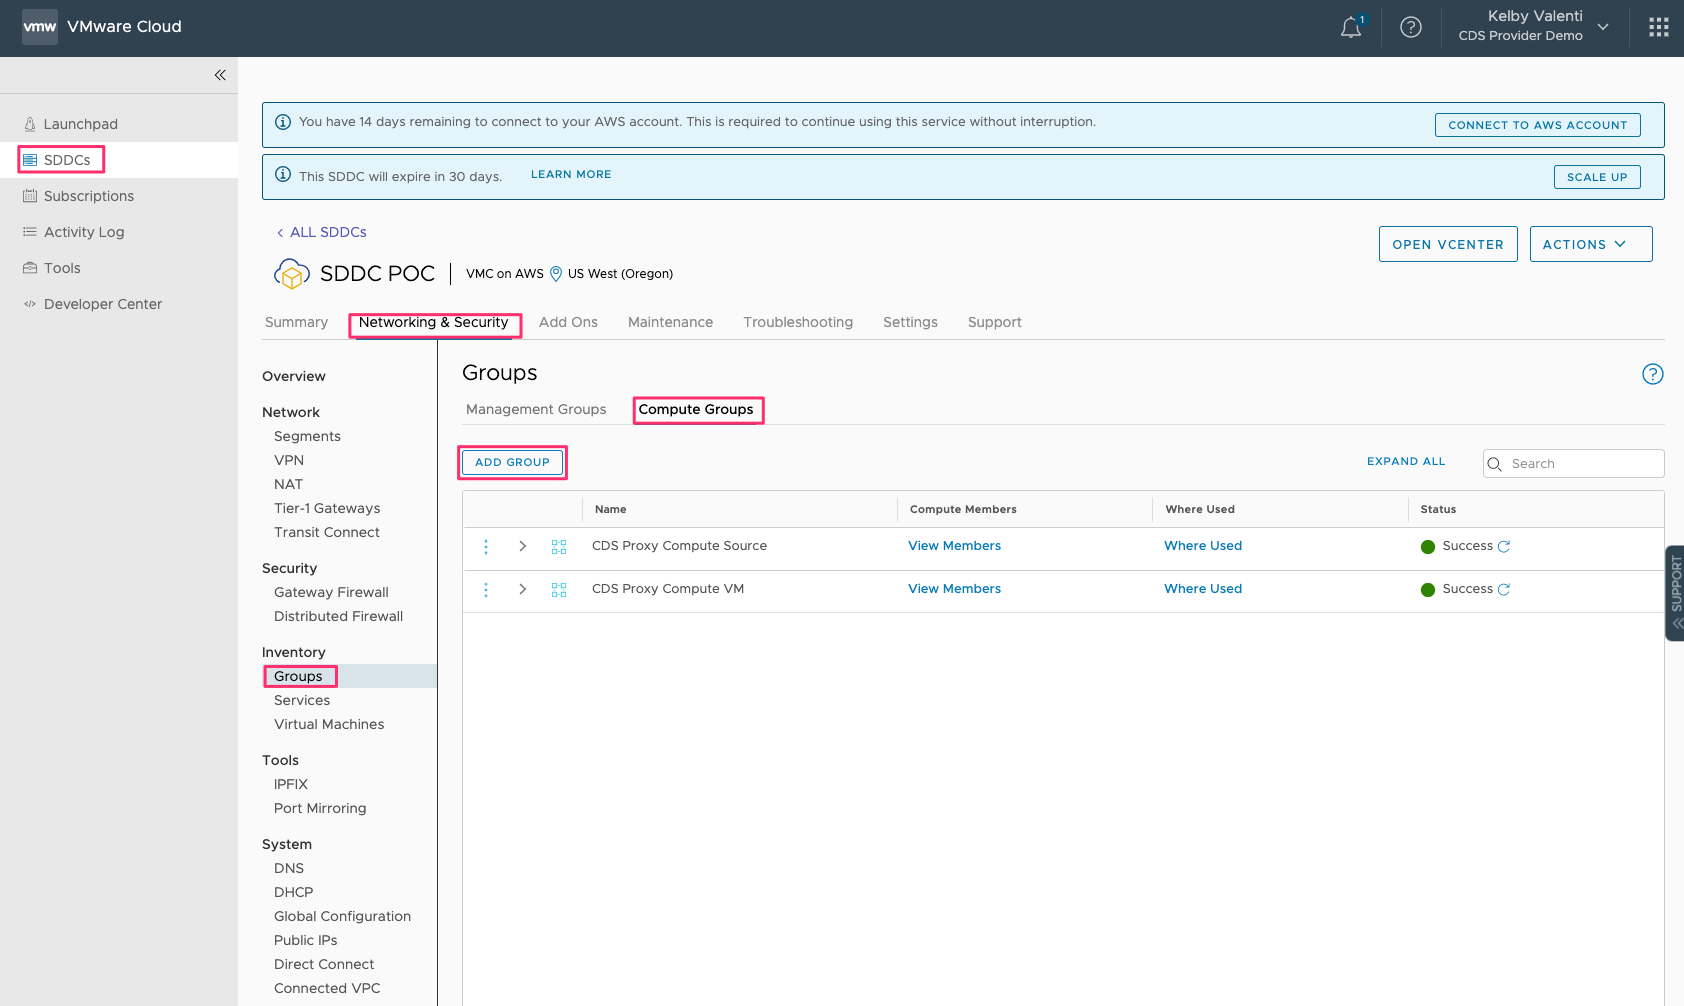
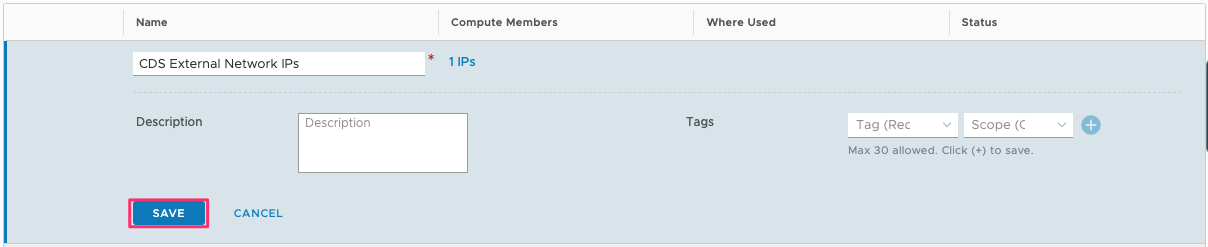
Create Inventory Group for External Networks #
-
Click Add Group
-
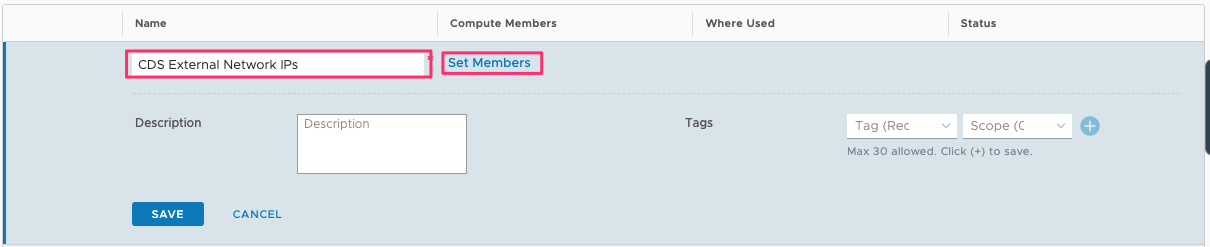
Enter Name and click on Set Members
-
Click on IP Addresses, enter the range associated with the external network previously specified and then click on APPLY

-
Click on SAVE
Create Firewall Rule to Allow VMware Cloud Director service Tenant Traffic #
-
Click Add Rule
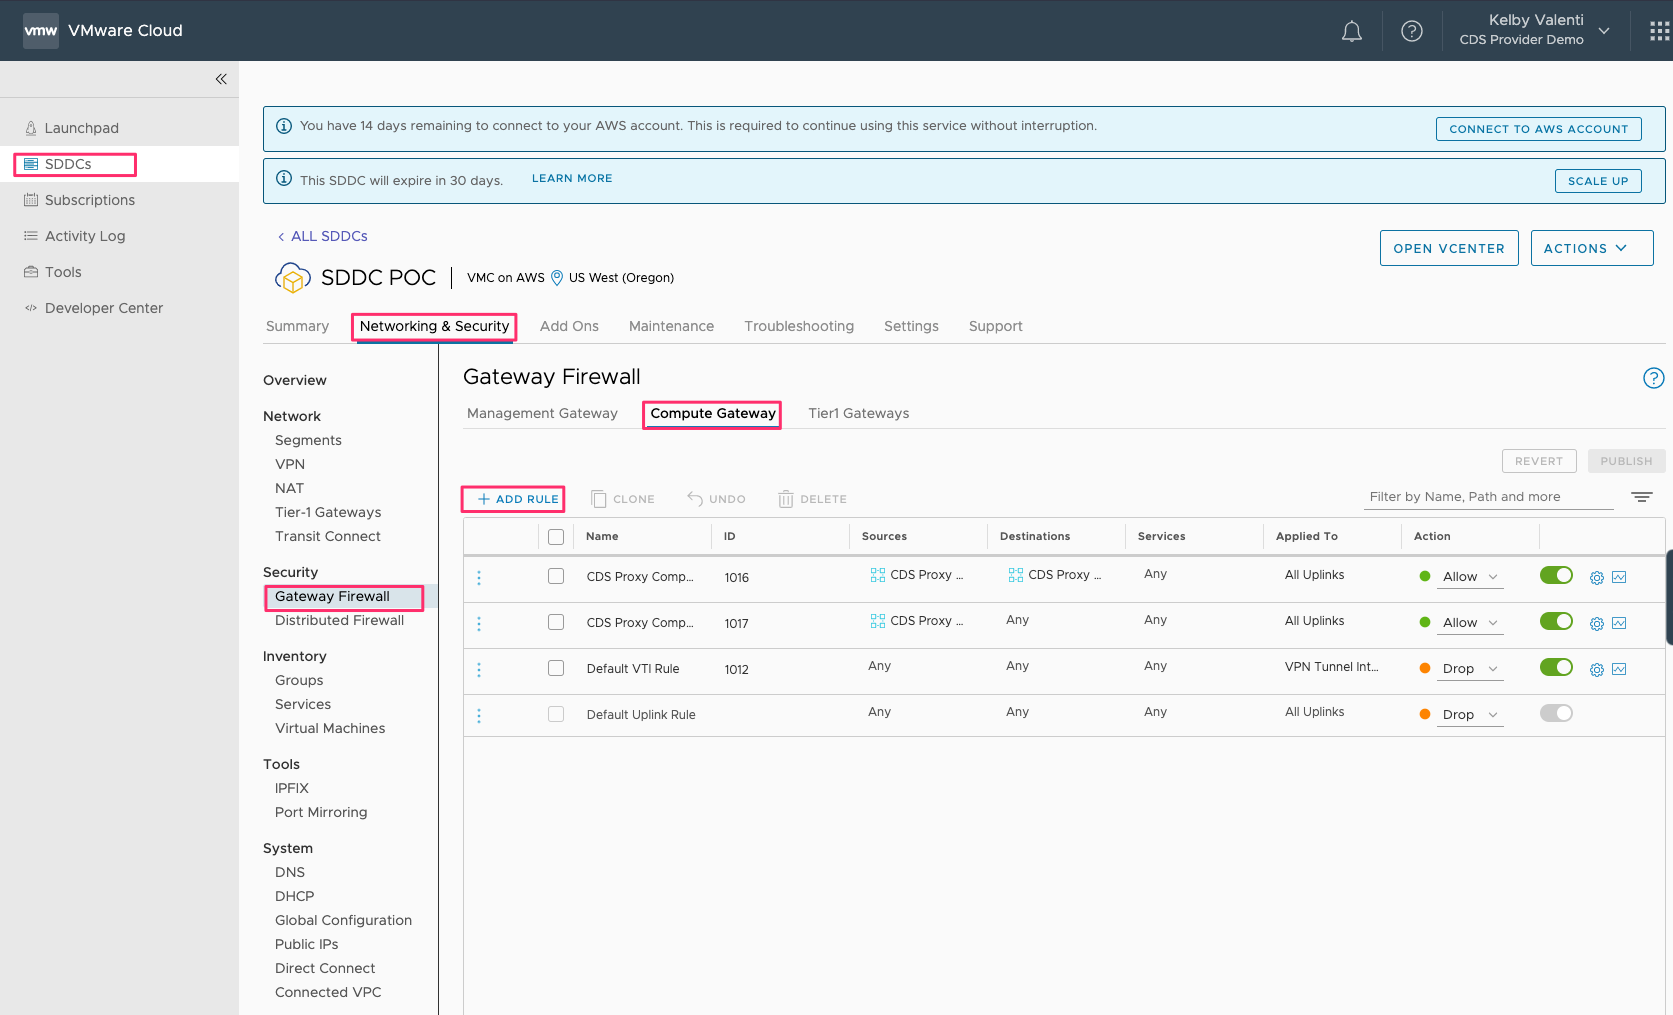
-
Add rule details and then click on PUBLISH.
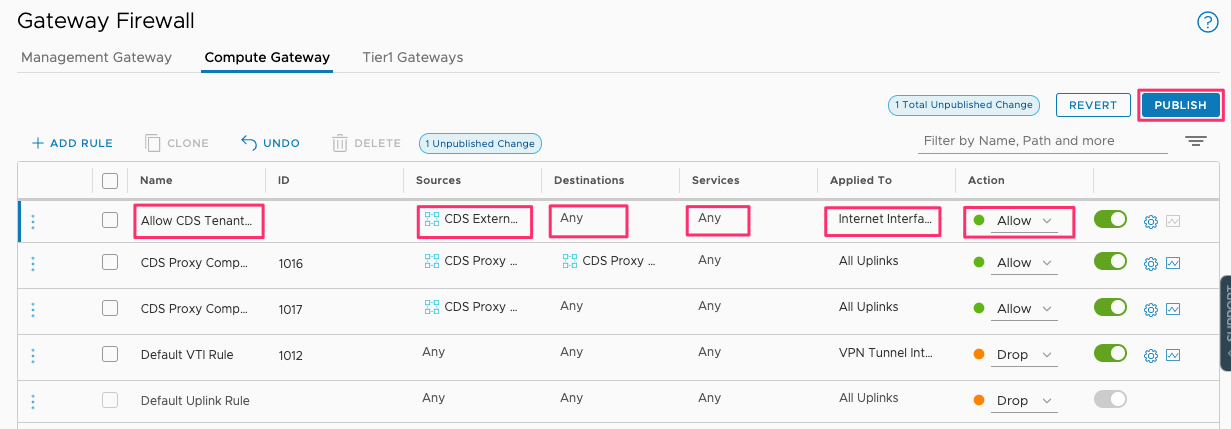
Notes: For Sources, make sure to select the Group created previously (VMware Cloud Director service External Network Ips). For Applied To, make sure to select Internet Interface.
Create First Tenant #
Create Organization #
- Click on New
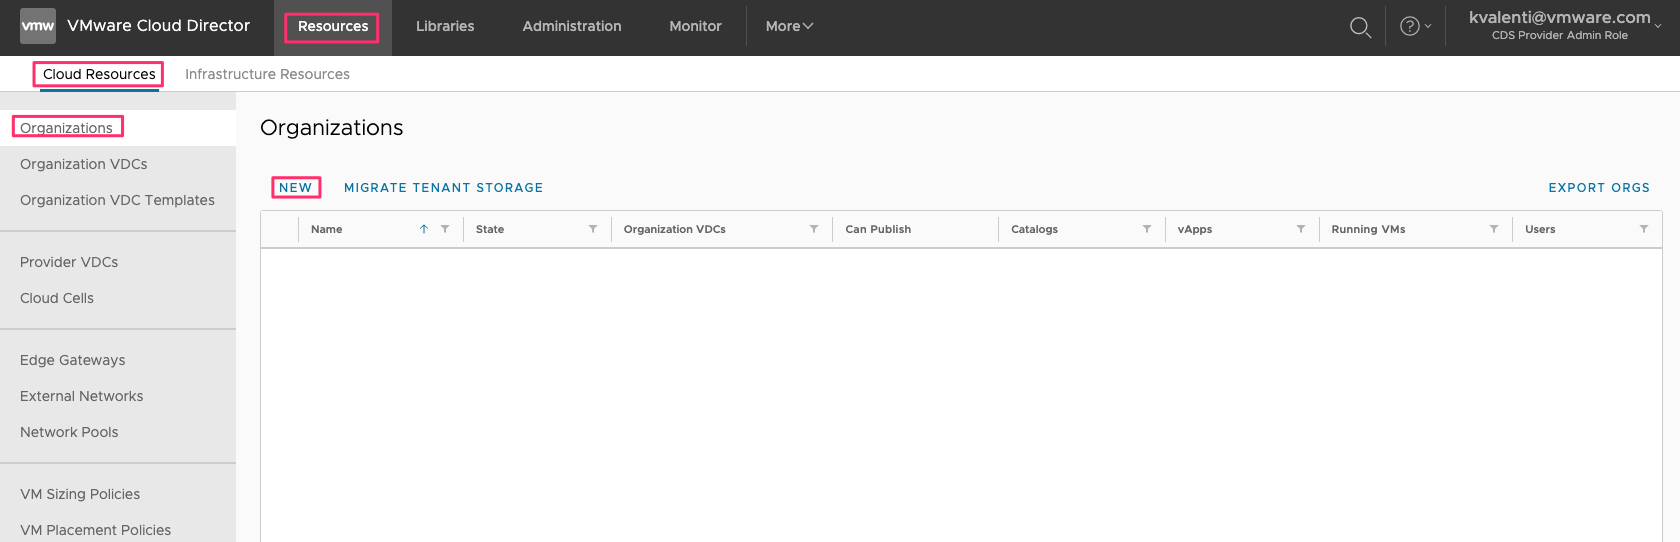
- Fill in details and click on CREATE

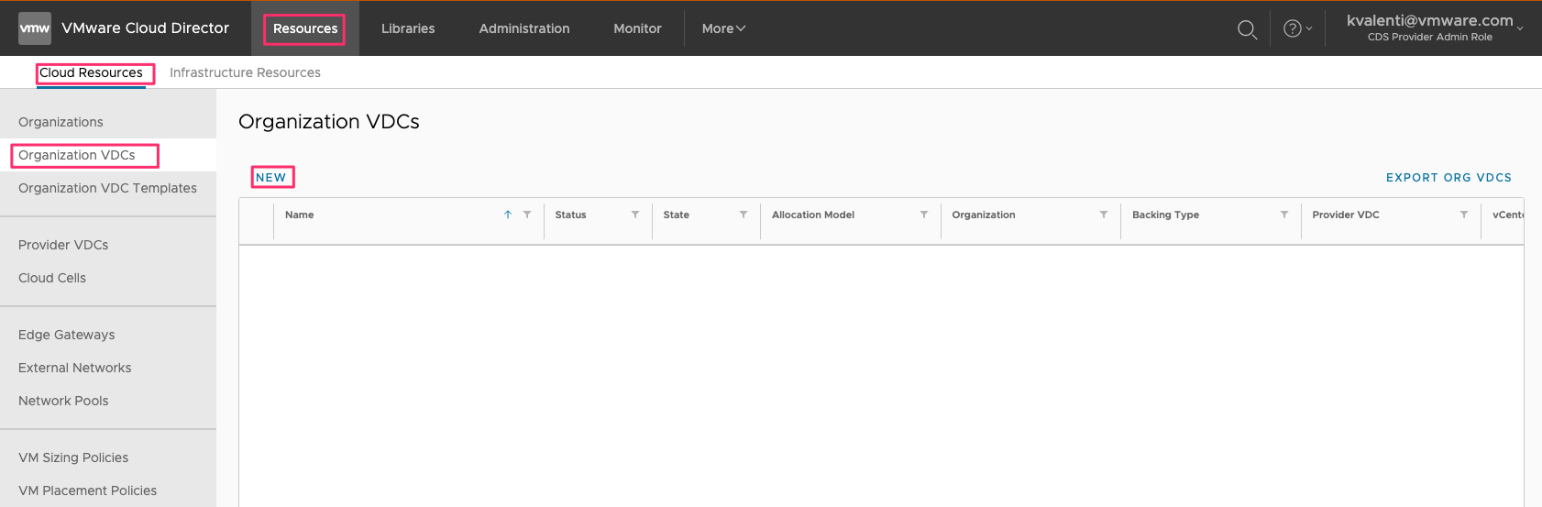
Create Organization VDC #
-
Click on NEW
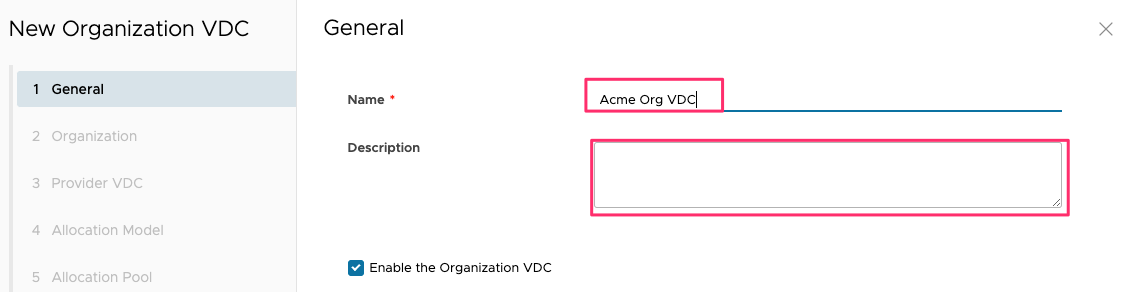
-
Fill in General details and click NEXT
-
Select Organization and click NEXT

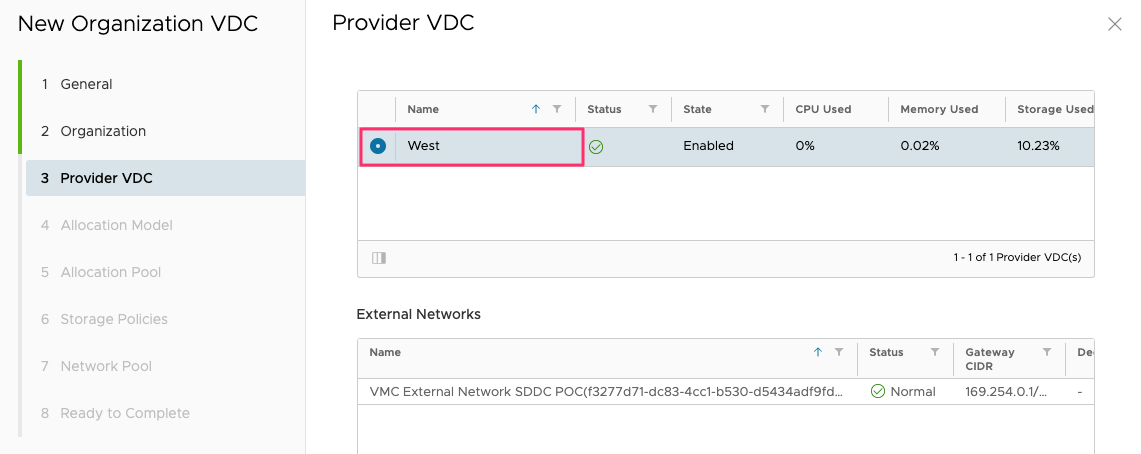
-
Select Provider VDC and click NEXT
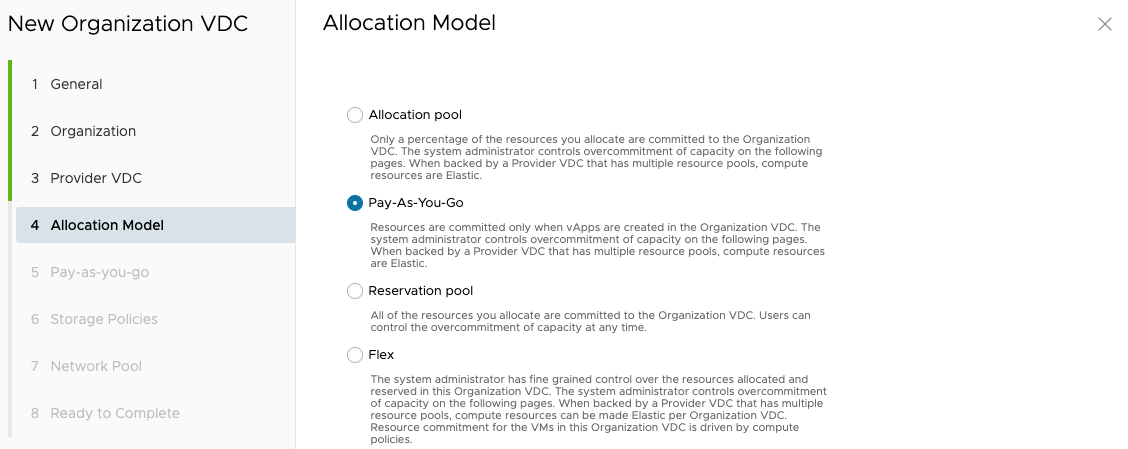
-
Select Allocation Model and click NEXT
-
Enter details and click NEXT
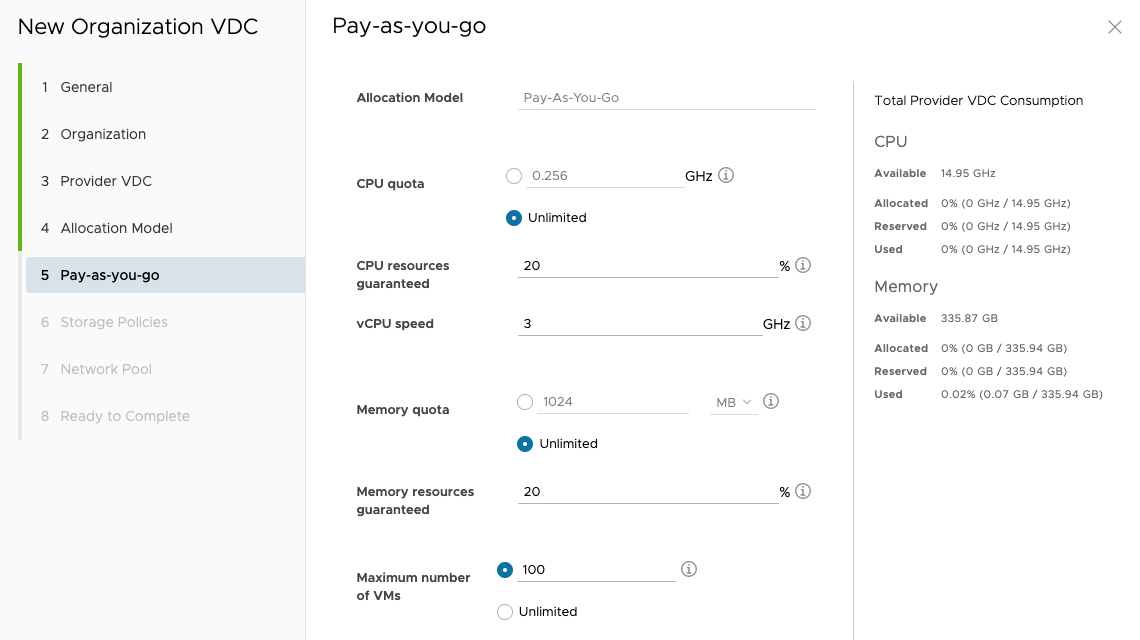
-
Select Storage Policy and click NEXT
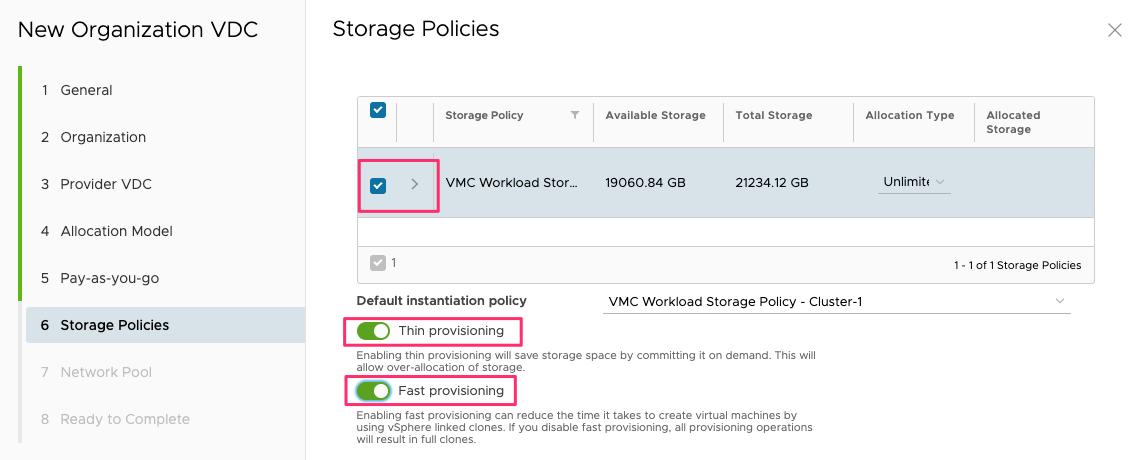
Note: Thin provisioning and Fast provisioning are recommended, but not required.
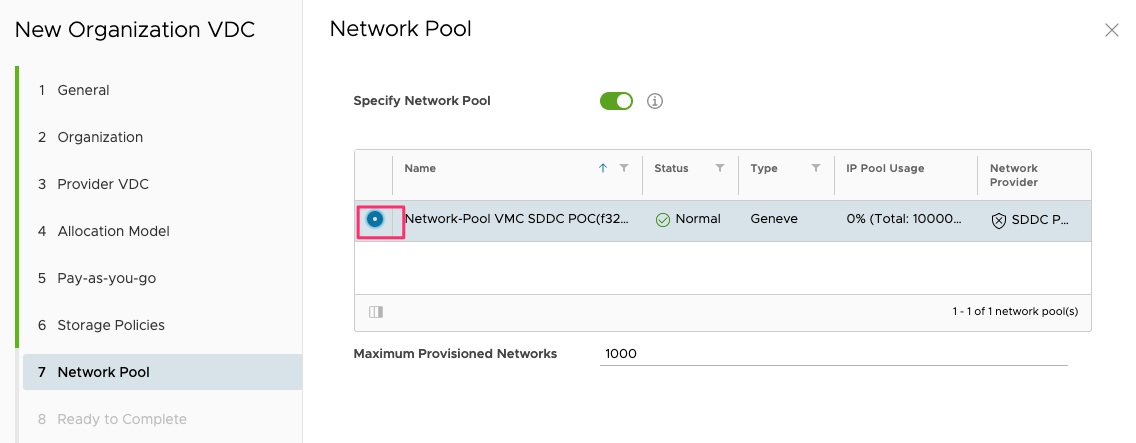
-
Select Network Pool and click NEXT
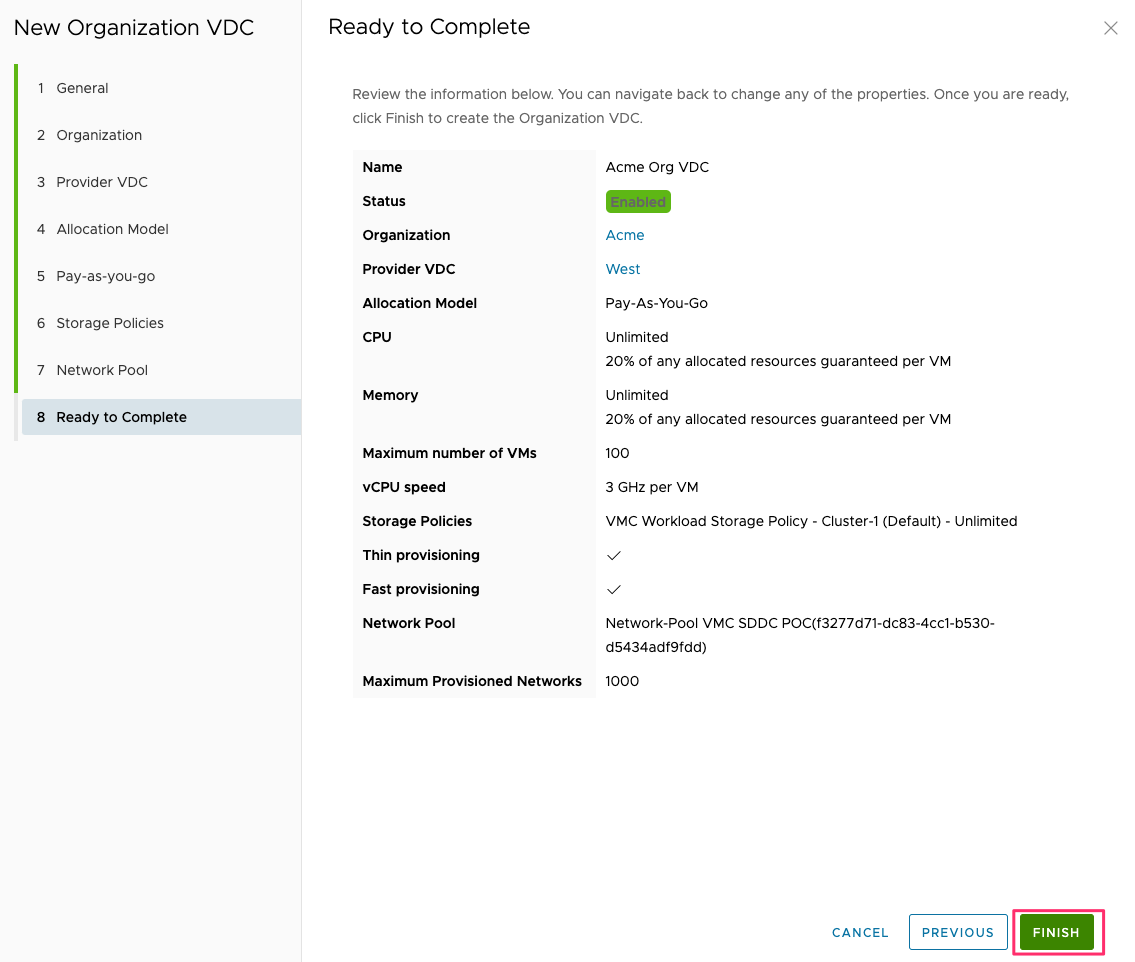
-
Confirm and click FINISH
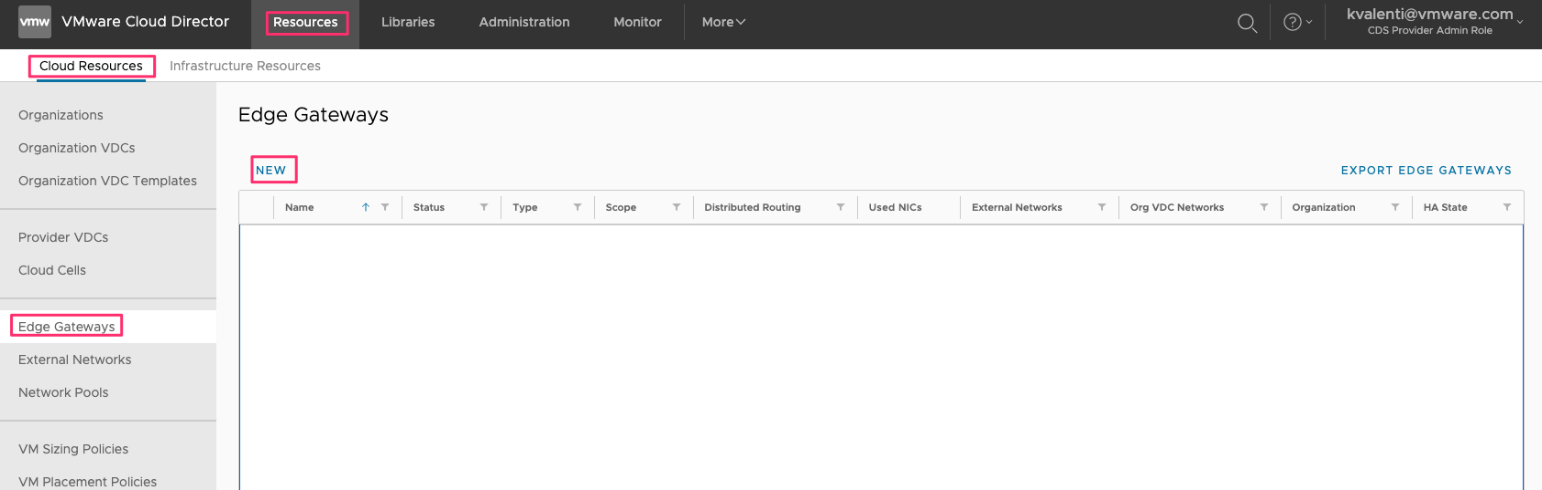
Create Edge Gateway #
-
Click on NEW
-
Select Organization VDC and click on NEXT

-
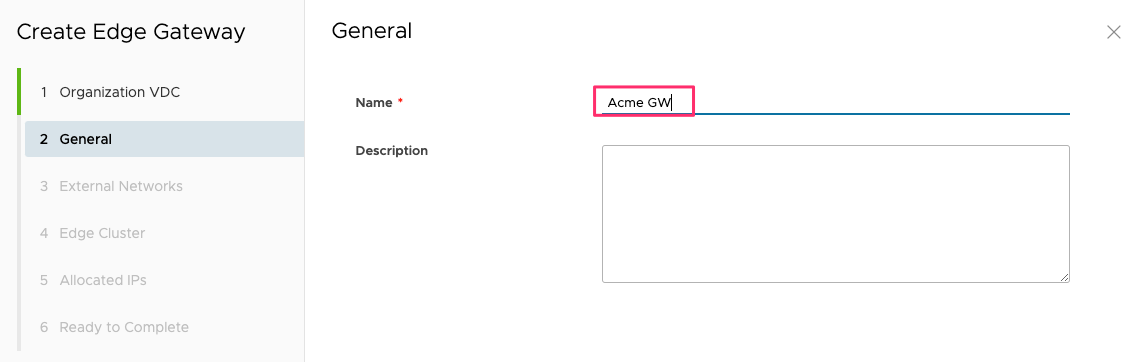
Enter Name and click on NEXT
-
Select External Network and click on NEXT

-
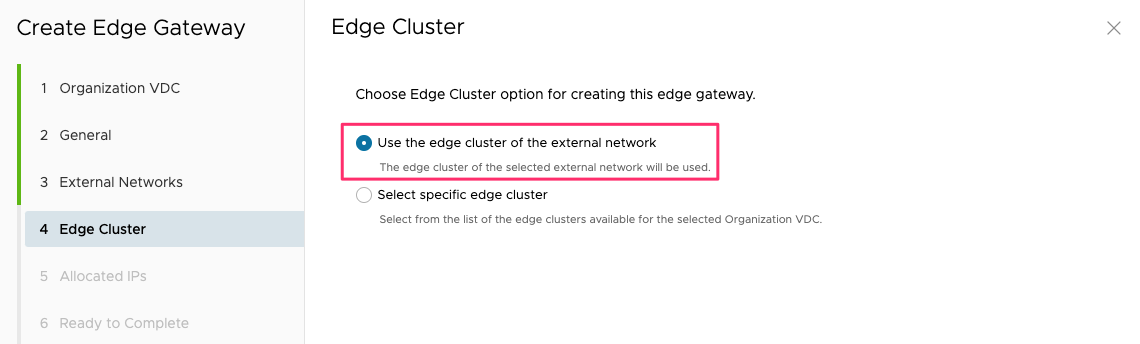
Select Edge Cluster and click on NEXT
-
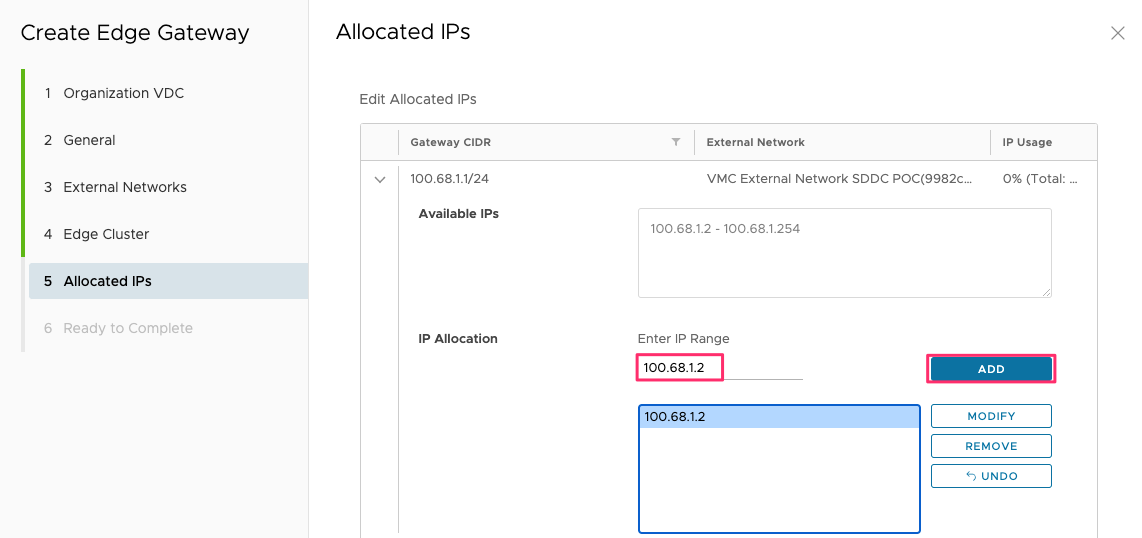
Add IP Allocation, click ADD, then click on NEXT
-
Review and click FINISH

Request a public IP for Tenant’s edge #
-
Click REQUEST NEW IP
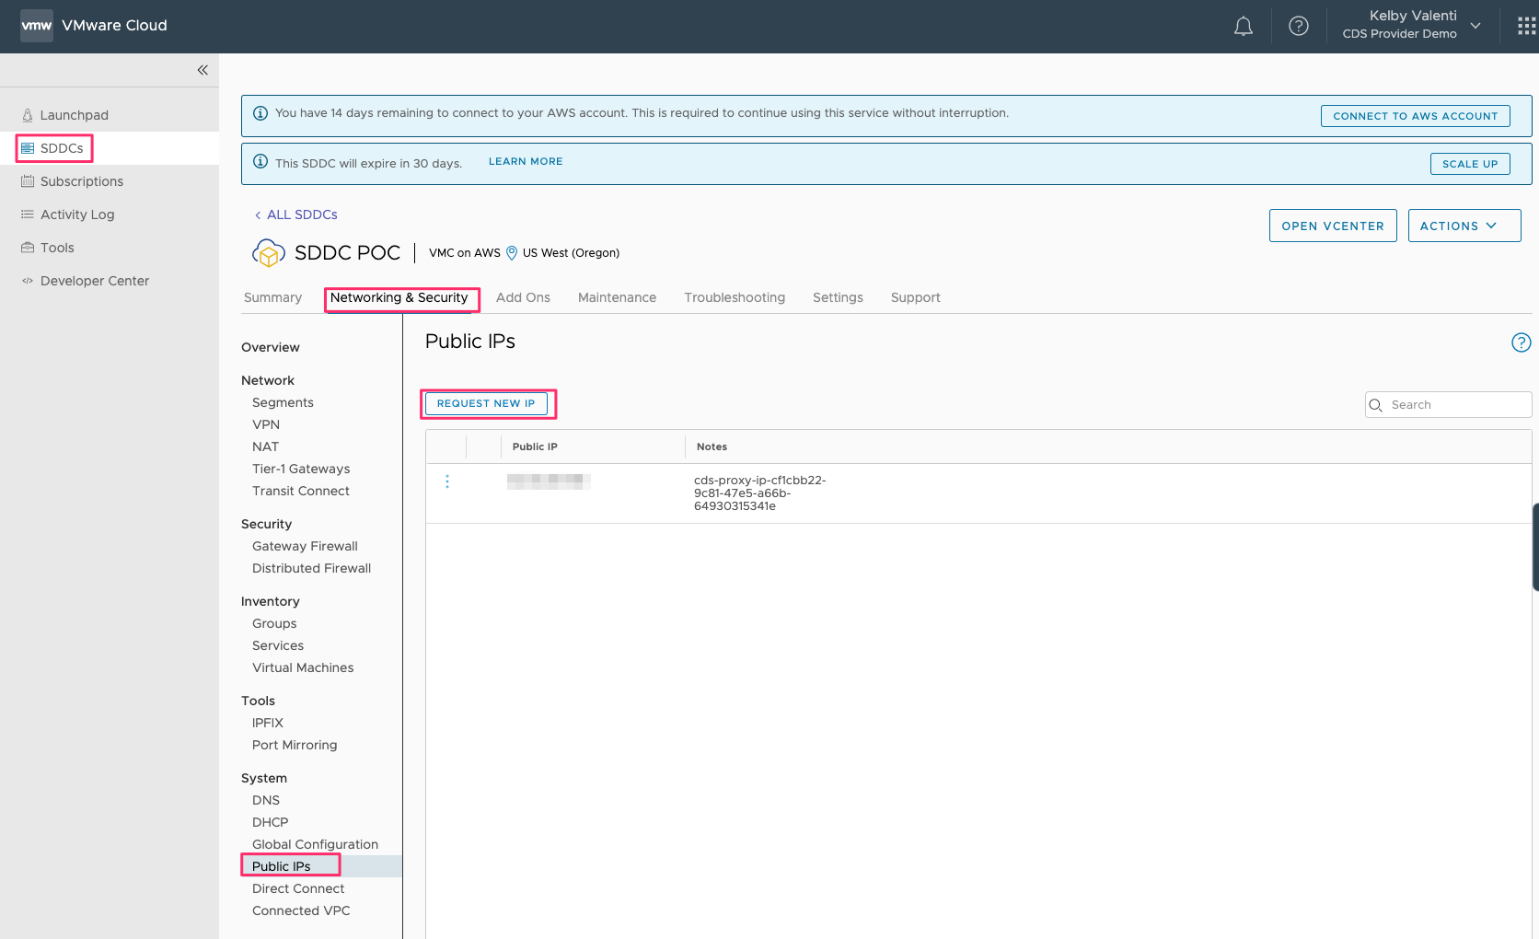
-
Enter Notes and then click SAVE

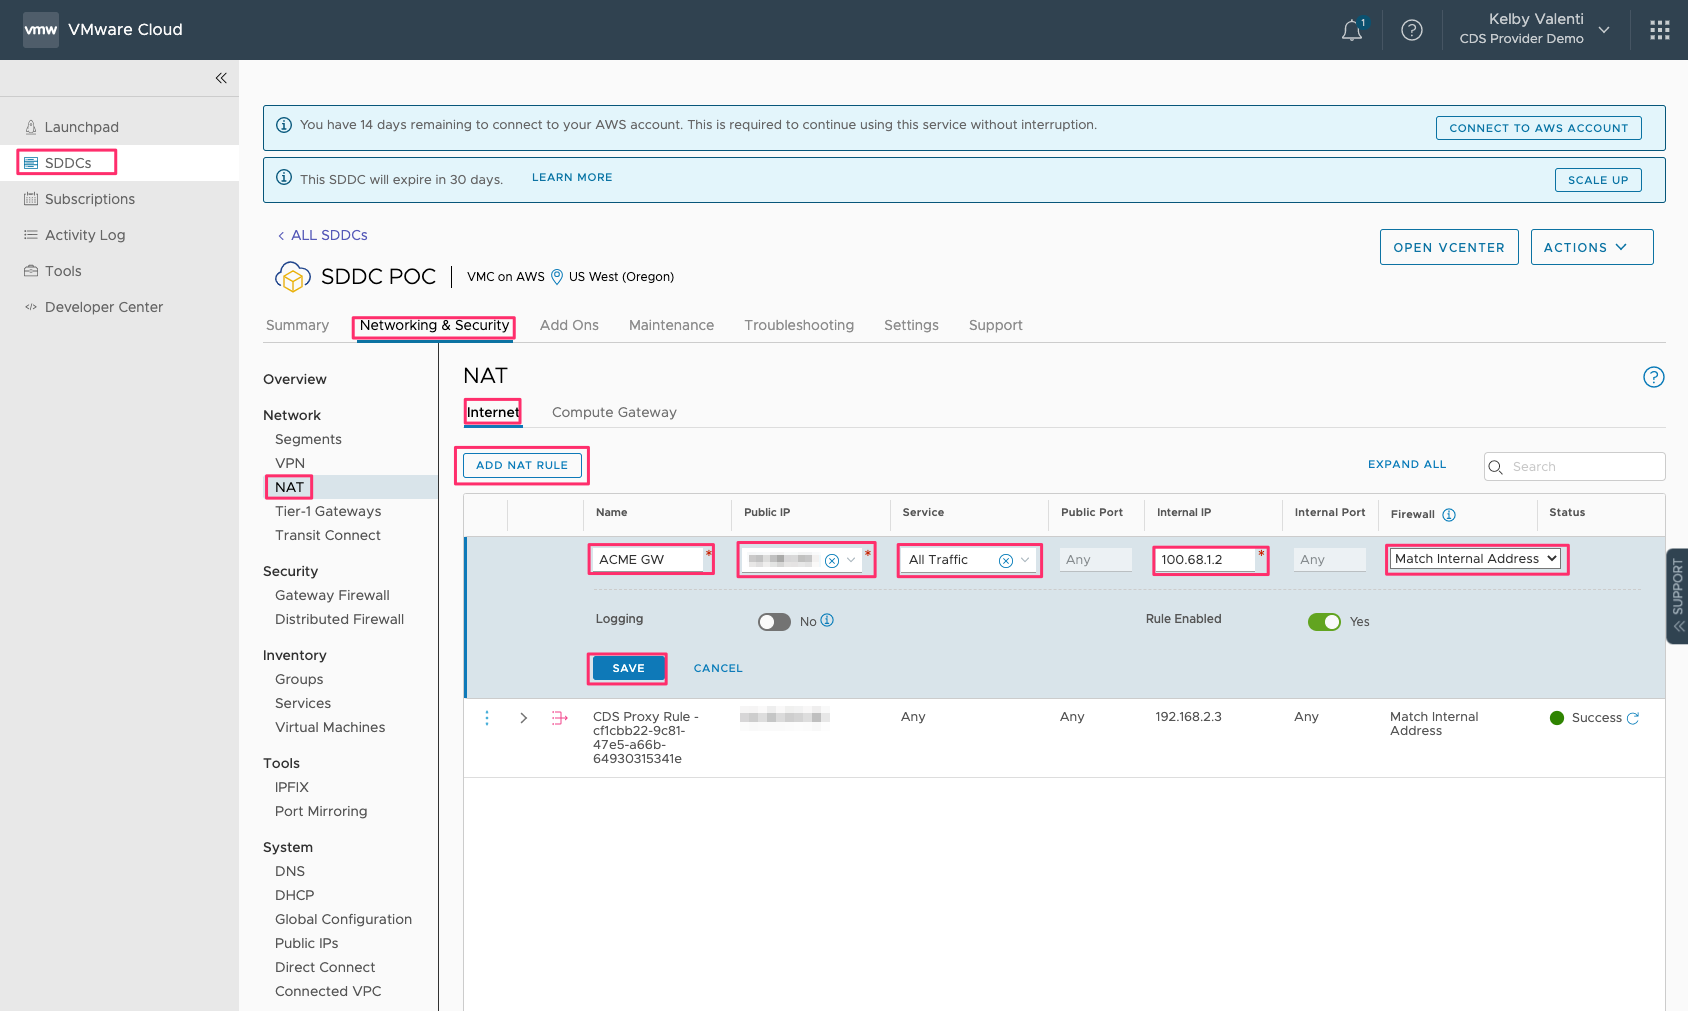
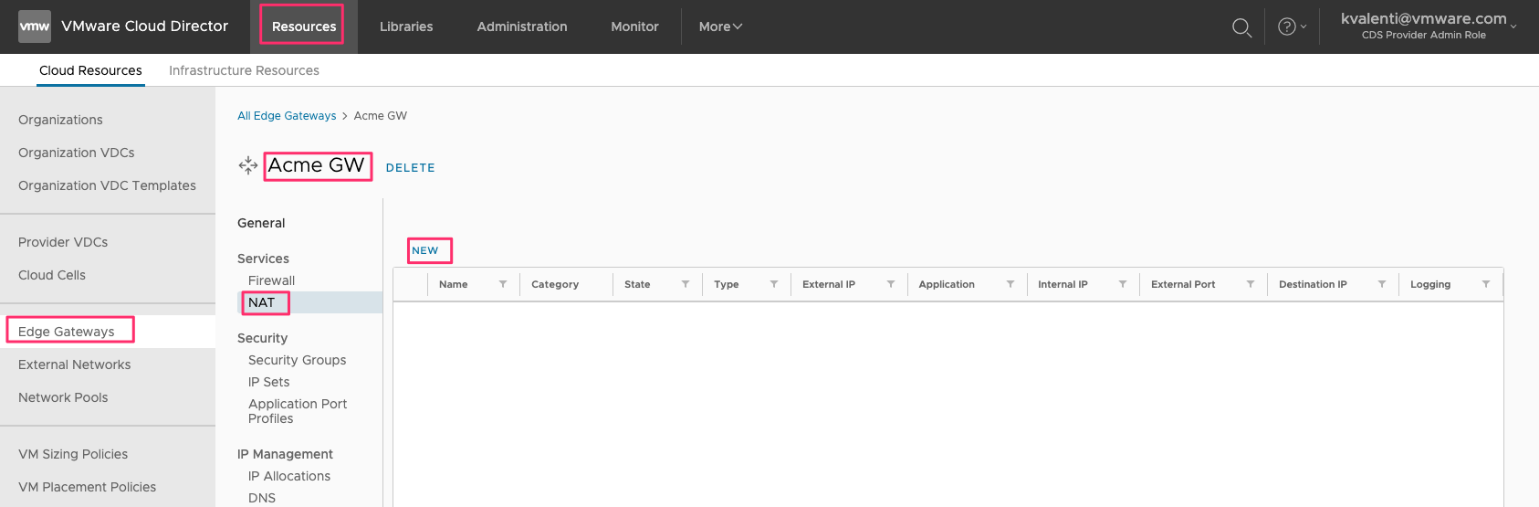
Create a NAT pointing to the tenant’s edge gateway #
-
Click on ADD NAT RULE.
-
Select previously created public IP and make sure that the Internal IP matches the IP assigned to the edge gateway.
-
Click SAVE
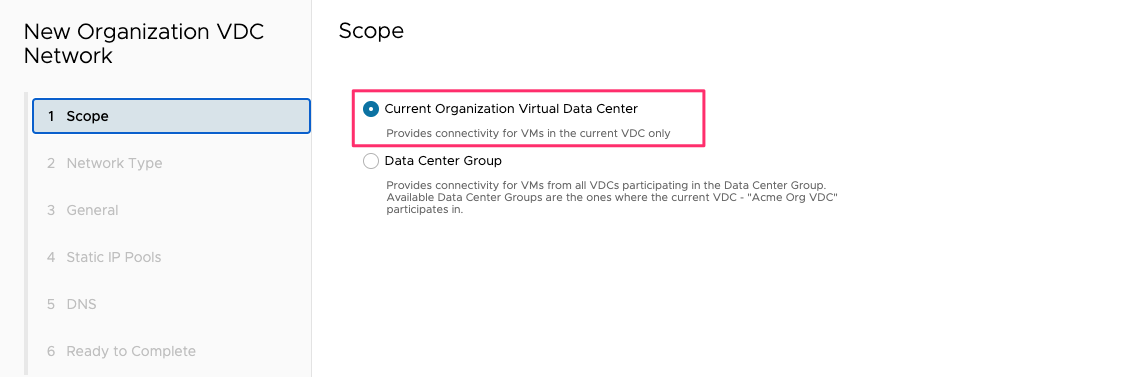
Create Organization network #
-
Open Tenant portal by click on the box with the arrow next to the selected organization

-
Click on NEW

-
Select Scope and then click NEXT
-
Select Routed and then click NEXT
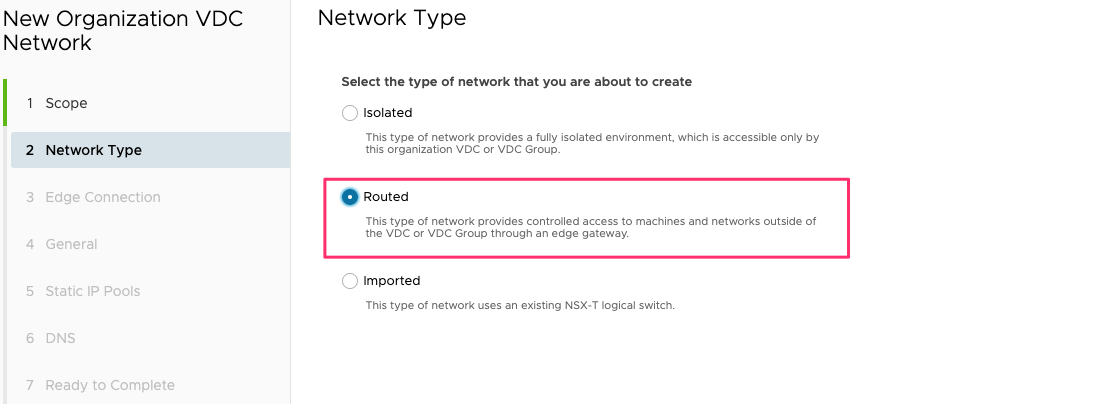
-
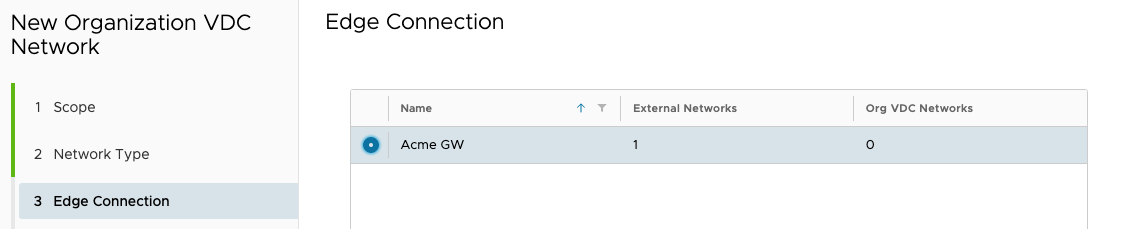
Select edge and the click NEXT
-
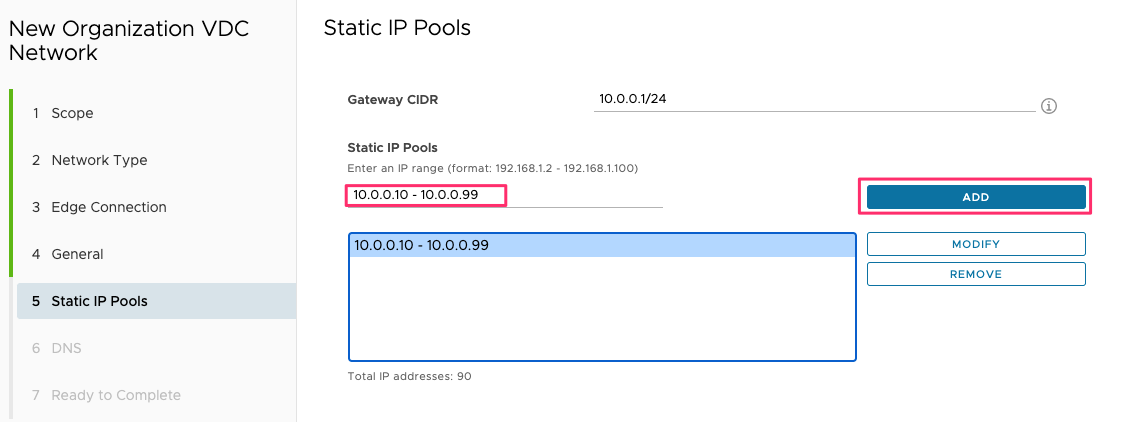
Enter name and CIDR and then click on NEXT

-
Enter Static IP Pool and then click on NEXT
-
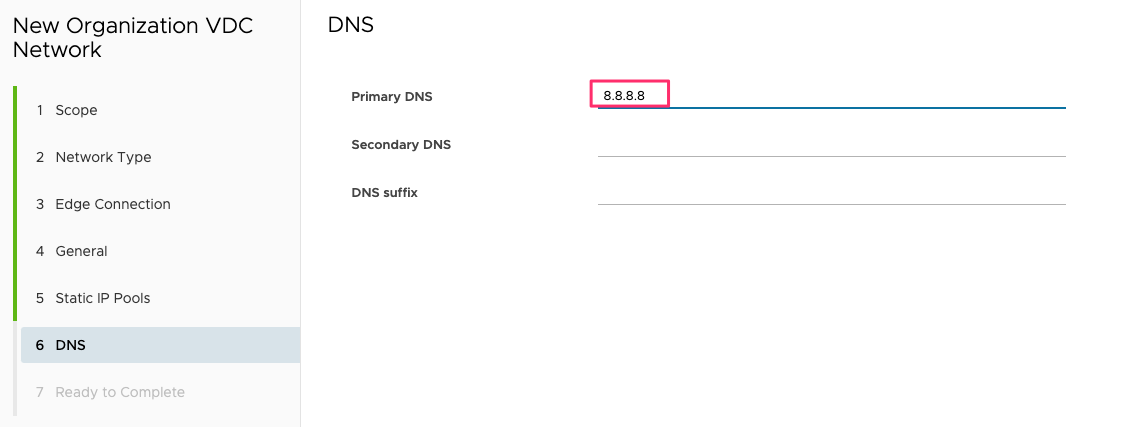
Enter DNS and then click on NEXT
-
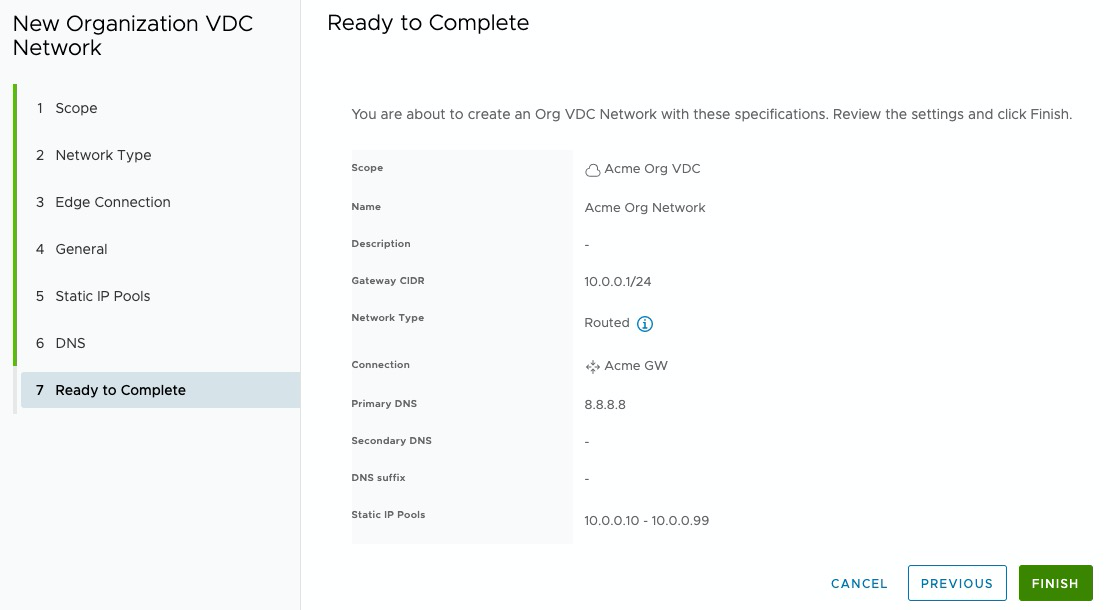
Review and click FINISH
Create SNAT to allow outbound traffic #
-
Select proper edge gateway and then under NAT click on NEW
-
Enter SNAT information and then click on SAVE.
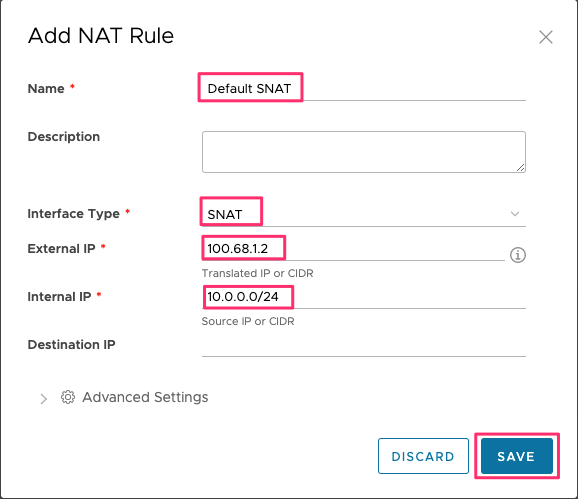
Note: Make sure External IP is on the Edge and that the Internal IP matches the org network subnet
Conclusion #
At this point, the VMware Cloud Director service Instance is ready to deploy tenant VMs. For more information see the documentation for VMware Cloud on AWS, VMware Cloud Director service and VMware Cloud Director.